

Table of contents
- Workflow:
- Create a Jenkins and Terraform file
- Create an EC2 instance on AWS
- Connect to the EC2 instance using SSH
- Install Jenkins on the EC2 instance
- Install Terraform on EC2 Instance
- Setting up inbound rules for Jenkins
- Manage some Jenkins plugins
- Create an IAM User on AWS
- Generate Access Key for IAM User on AWS
- Add credentials in Jenkins
- Create a Pipeline in Jenkins
- Initialize the Build
- Congratulations you have successfully created AWS Resources with Terraform and Jenkins 🎉
In this blog, we will create AWS Resources like an EC2 instance using Terraform and Jenkins.
Workflow:

The steps that will be followed for this project are:
Create a Jenkins and Terraform file and Push the code to GitHub.
Create an EC2 Instance on AWS.
Connect to the EC2 instance using SSH.
Install Jenkins on the EC2 Instance.
Install Terraform on EC2 Instance.
Setting up inbound rules for Jenkins.
Manage some Jenkins plugins.
Create an IAM User on AWS.
Generate Access Key for IAM User on AWS.
Add credentials in Jenkins.
Create a Pipeline in Jenkins.
Initialize the Build.
Create a Jenkins and Terraform file
First, open your GitHub and create a new repository, You can name it whatever you want.
Now clone that repository into your local computer.
Now open the cloned project in Code Editor and create a Jenkins file named
Jenkinsfile, and add the given code to that file.
pipeline {

    parameters {
        booleanParam(name: 'autoApprove', defaultValue: false, description: 'Automatically run apply after generating plan?')
    }
    environment {
        AWS_ACCESS_KEY_ID     = credentials('AWS_ACCESS_KEY_ID')
        AWS_SECRET_ACCESS_KEY = credentials('AWS_SECRET_ACCESS_KEY')
    }

   agent  any
    stages {
        stage('checkout') {
            steps {
                 script{
                        dir("terraform")
                        {
                            git branch: 'main', credentialsId: 'credentials', url: 'https://github.com/Jai-Solania-29/Terraform-Jenkins-AWS.git'
                        }
                    }
                }
            }

        stage('Plan') {
            steps {
                sh 'pwd;cd terraform/ ; terraform init'
                sh "pwd;cd terraform/ ; terraform plan -out tfplan"
                sh 'pwd;cd terraform/ ; terraform show -no-color tfplan > tfplan.txt'
            }
        }
        stage('Approval') {
           when {
               not {
                   equals expected: true, actual: params.autoApprove
               }
           }

           steps {
               script {
                    def plan = readFile 'terraform/tfplan.txt'
                    input message: "Do you want to apply the plan?",
                    parameters: [text(name: 'Plan', description: 'Please review the plan', defaultValue: plan)]
               }
           }
       }

        stage('Apply') {
            steps {
                sh "pwd;cd terraform/ ; terraform apply -input=false tfplan"
            }
        }
    }

  }
- Now create a Terraform file named
main.tfand add the given code to that file.
provider "aws" {
    region = "us-east-1"
}

resource "aws_instance" "test" {
  ami           = "ami-05fa00d4c63e32376" # us-west-2
  instance_type = "t2.micro"
  tags = {
      Name = "Terraform-Instance"
  }
}
- Now push this code to GitHub.

Create an EC2 instance on AWS
NOTE: For setting up your AWS account, if you are using it for the first time, you can check out this video youtu.be/FRQ9fE4fd5g
Open and Login to your AWS account.
Search for EC2 and open it.
- Click on Launch instance, give it a name, and select Ubuntu as AMI (Amazon Virtual Machine).

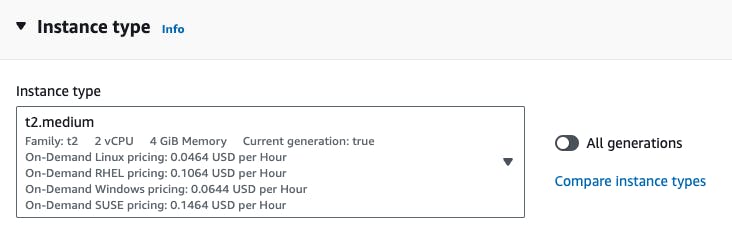
- Select t2.medium as the Instance type.
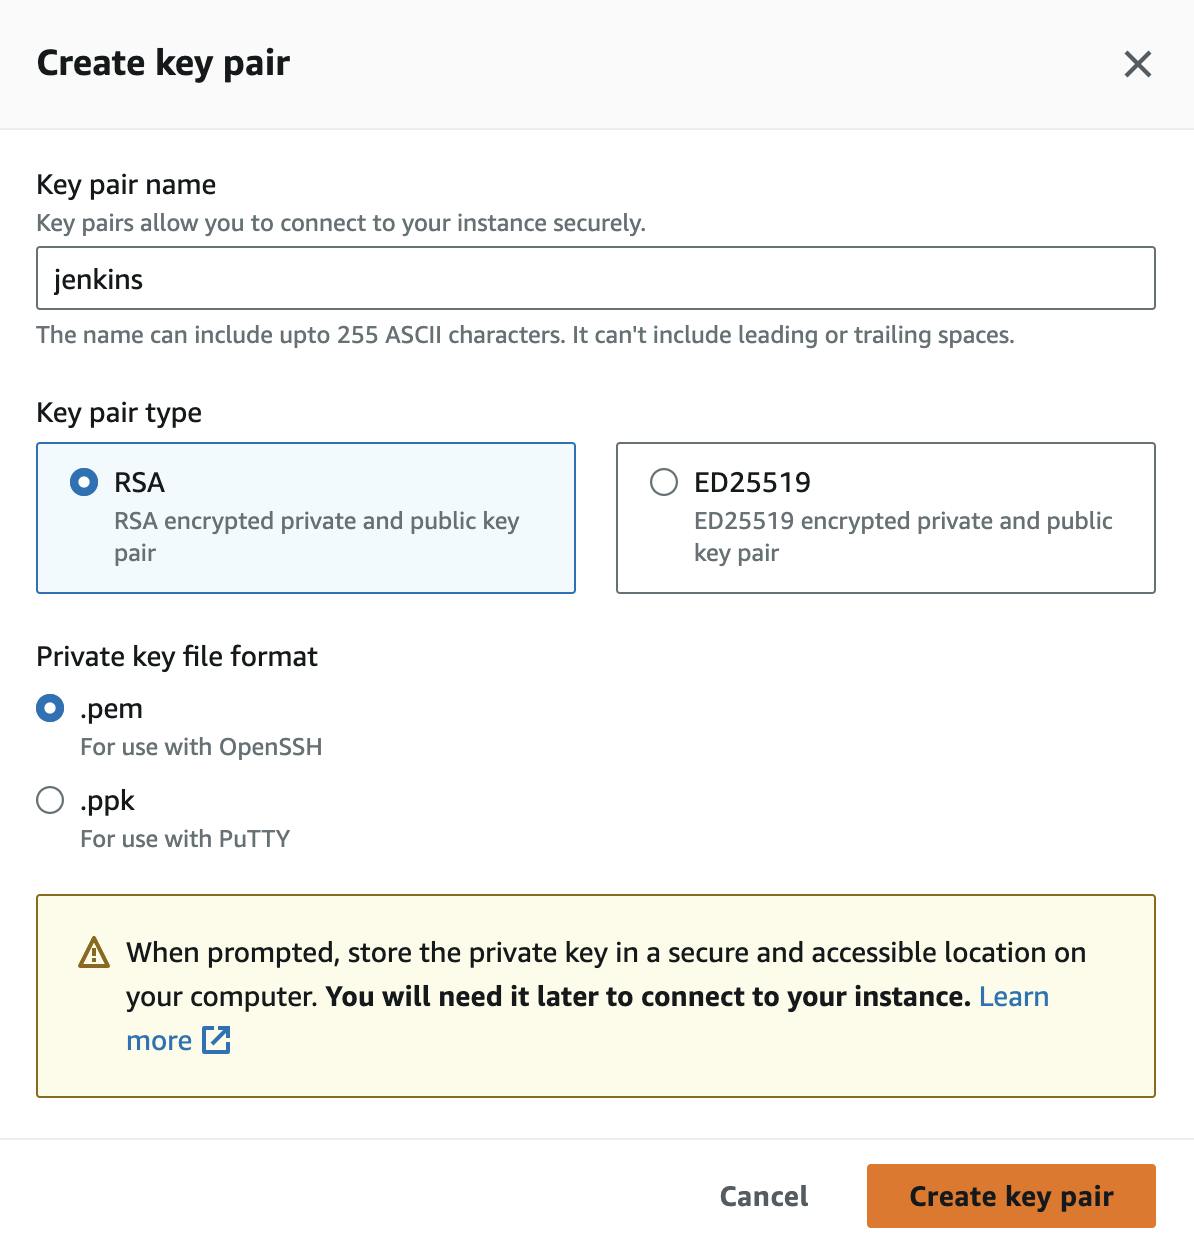
In the Key pair section click on Create new key pair if you don't have any existing key pair.
Now a popup will open, give a name to the Key pair, select type as RSA, file format as
.pem, and then click on Create key pair. This will download the key to your computer.
Now choose the newly generated key pair from the dropdown.
Leave all the remaining fields as default and then click on the Launch instance button in the bottom right corner of the screen to launch the instance.
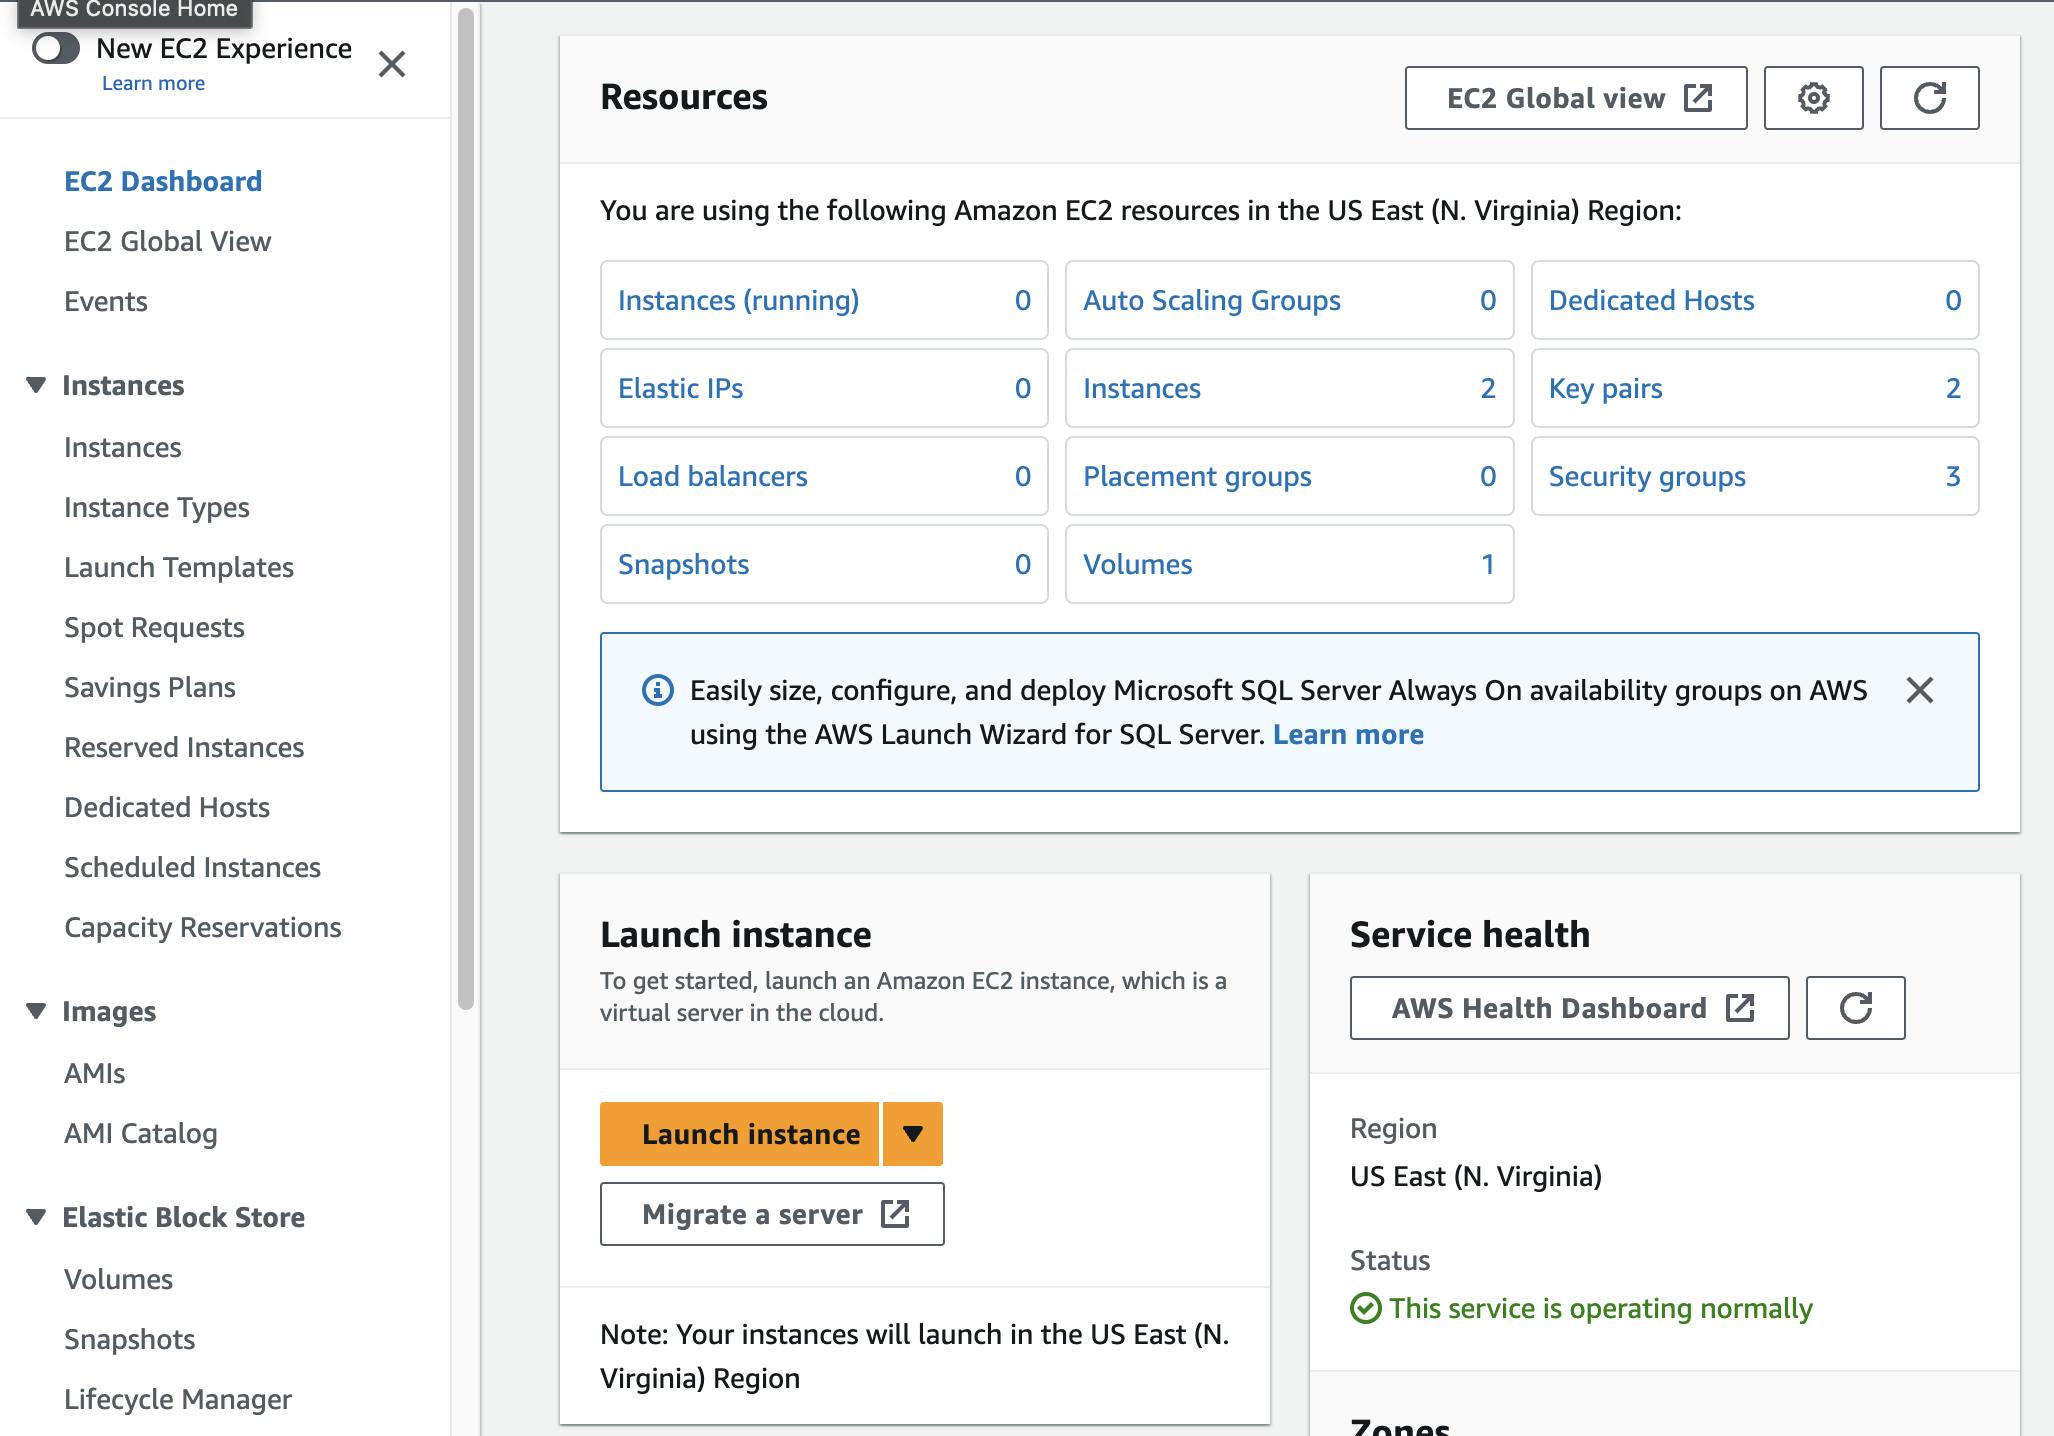
You can see the newly launched instance on EC2 Dashboard.

Congratulations you have successfully created an EC2 Instance 🎉
Connect to the EC2 instance using SSH
- Now select the Instance and click on the Connect button.

- This will open the Connect to Instance page:
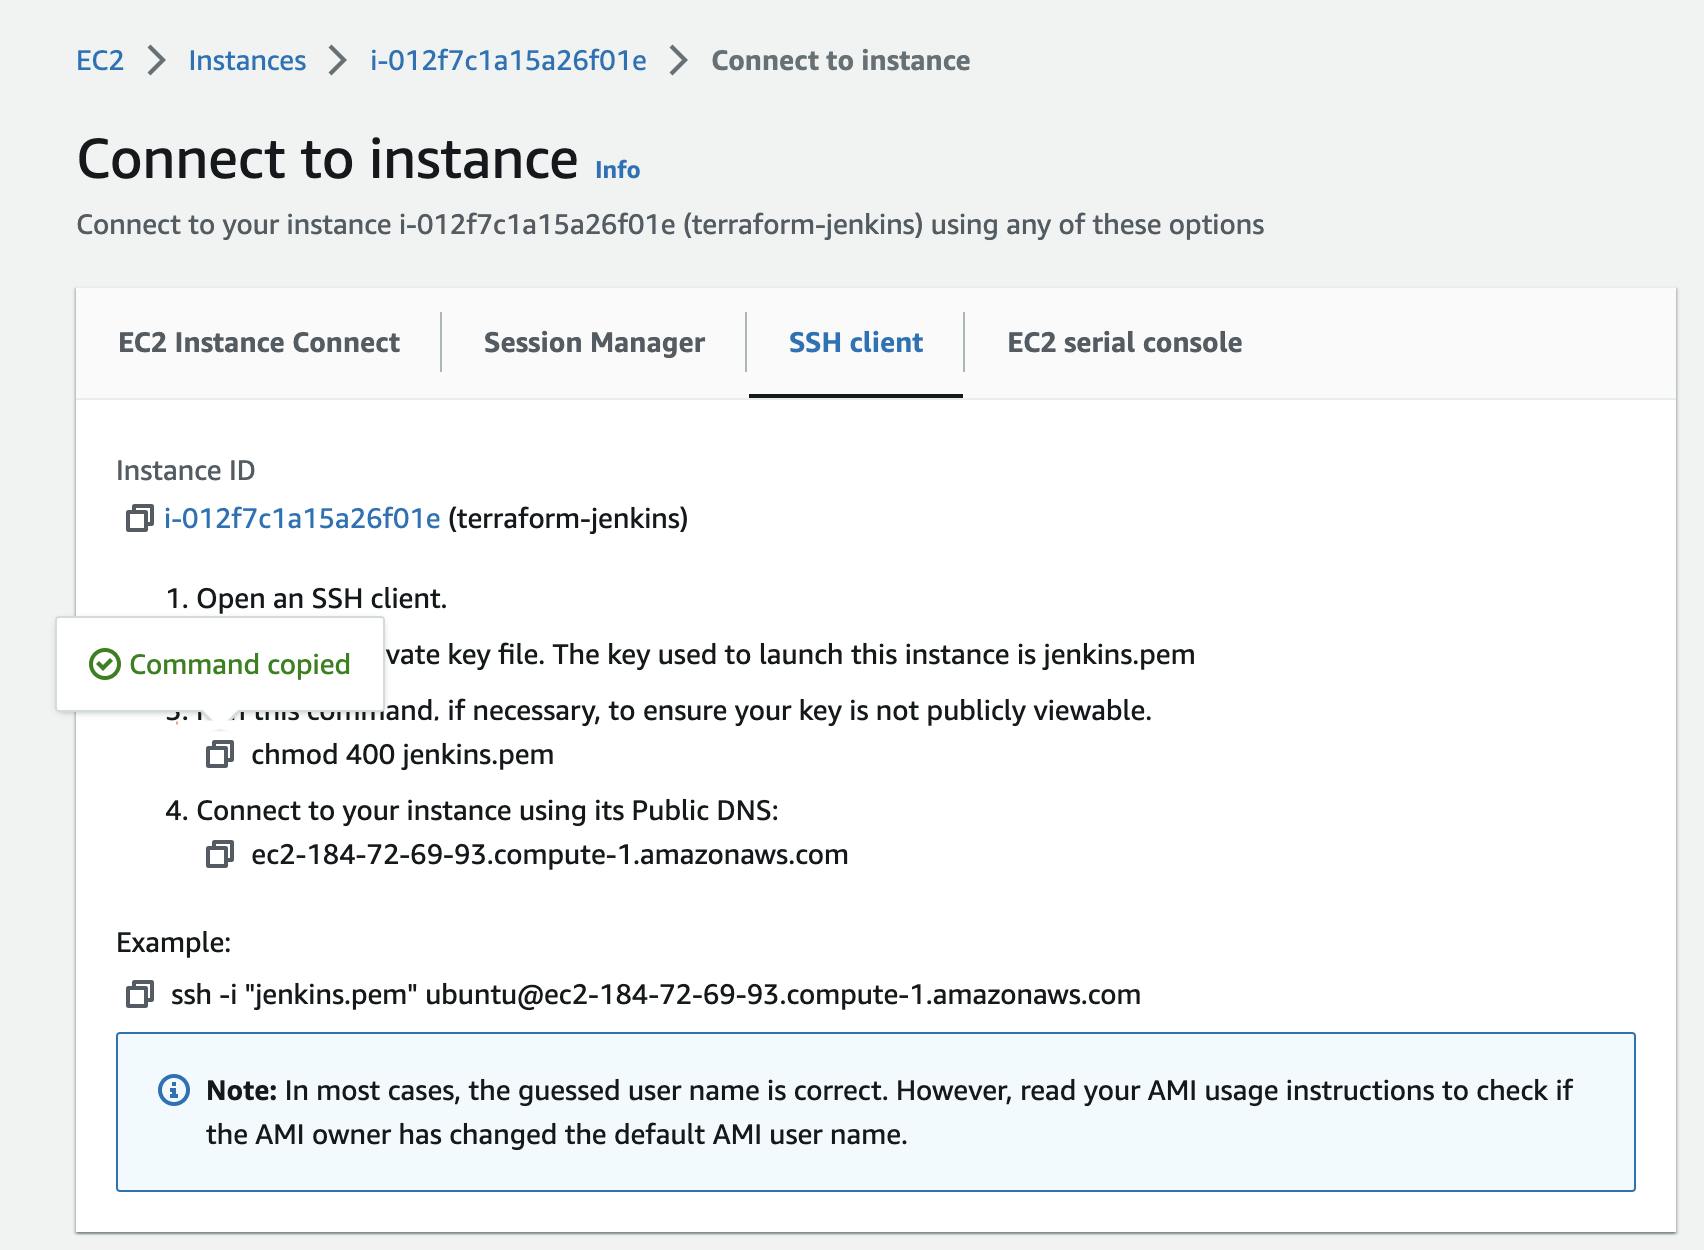
Now open the terminal and go to the directory where you have downloaded the key pair file, mine is in the downloads.
Copy the third command from the Connect to Instance page to ensure all permissions.

- And then, enter the command given under the example.

NOTE: Make sure to enter the following command with a sudo prefix, if you haven't done
sudoat the beginning.It will ask for a Password and other permissions to finally connect to the instance.

Congratulations you have successfully connected to the instance 🎉
Install Jenkins on the EC2 instance
- Jenkins is a JAVA-based application so first you need to download OpenJDK.
  sudo apt update
  sudo apt install openjdk-11-jre
- To check whether Java is installed or not enter the given command in the terminal.
java --version
- Now let's install Jenkins, Enter the given command in the terminal.
curl -fsSL https://pkg.jenkins.io/debian-stable/jenkins.io-2023.key | sudo tee \
  /usr/share/keyrings/jenkins-keyring.asc > /dev/null
echo deb [signed-by=/usr/share/keyrings/jenkins-keyring.asc] \
  https://pkg.jenkins.io/debian-stable binary/ | sudo tee \
  /etc/apt/sources.list.d/jenkins.list > /dev/null
sudo apt-get update
sudo apt-get install jenkins
- Jenkins is now installed, to check its status enter the given command in the terminal.
sudo systemctl status jenkins
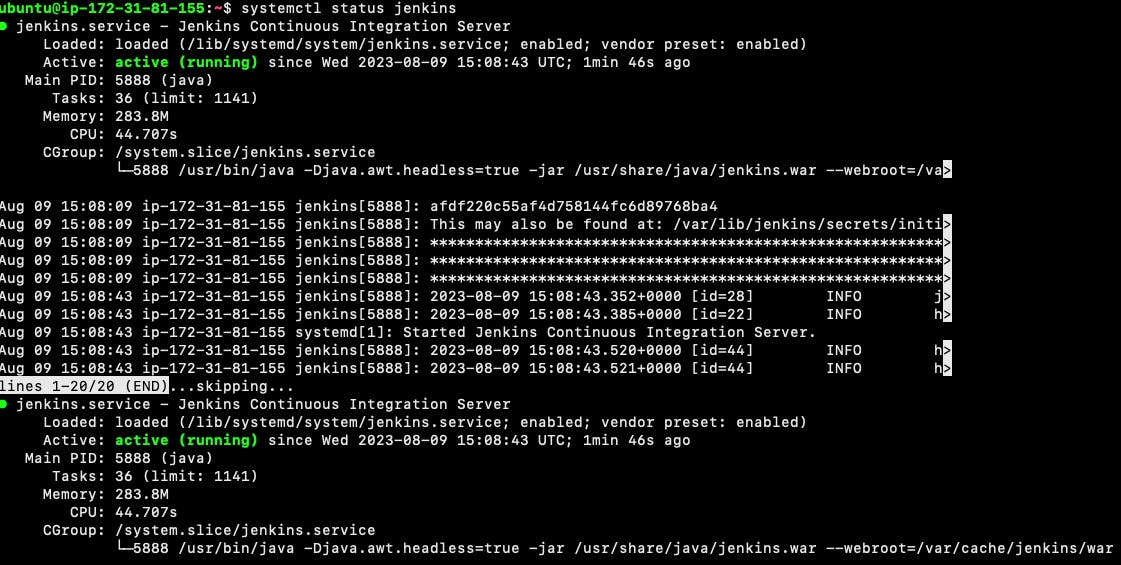
Congratulations you have successfully installed Jenkins on the EC2 Instance 🎉
Install Terraform on EC2 Instance
As you are going to use Terraform to create AWS resources, so you need to install Terraform on the Instance that you are using.
Follow the given commands to install Terraform on the Instance.
Ensure that your system is up to date and you have installed the
gnupg,software-properties-common, andcurlpackages installed. You will use these packages to verify HashiCorp's GPG signature and install HashiCorp's Debian package repository.
sudo apt-get update && sudo apt-get install -y gnupg software-properties-common
- Install the HashiCorp GPG key.
wget -O- https://apt.releases.hashicorp.com/gpg | \
gpg --dearmor | \
sudo tee /usr/share/keyrings/hashicorp-archive-keyring.gpg
- Verify the key's fingerprint.
gpg --no-default-keyring \
--keyring /usr/share/keyrings/hashicorp-archive-keyring.gpg \
--fingerprint
- Add the official HashiCorp repository to your system. The
lsb_release -cscommand finds the distribution release codename for your current system, such asbuster,groovy, orsid.
echo "deb [signed-by=/usr/share/keyrings/hashicorp-archive-keyring.gpg] \
https://apt.releases.hashicorp.com $(lsb_release -cs) main" | \
sudo tee /etc/apt/sources.list.d/hashicorp.list
- Download the package information from HashiCorp.
sudo apt update
- Install Terraform from the new repository.
sudo apt-get install terraform
- To verify the installation enter the following command in the terminal.
terraform -help
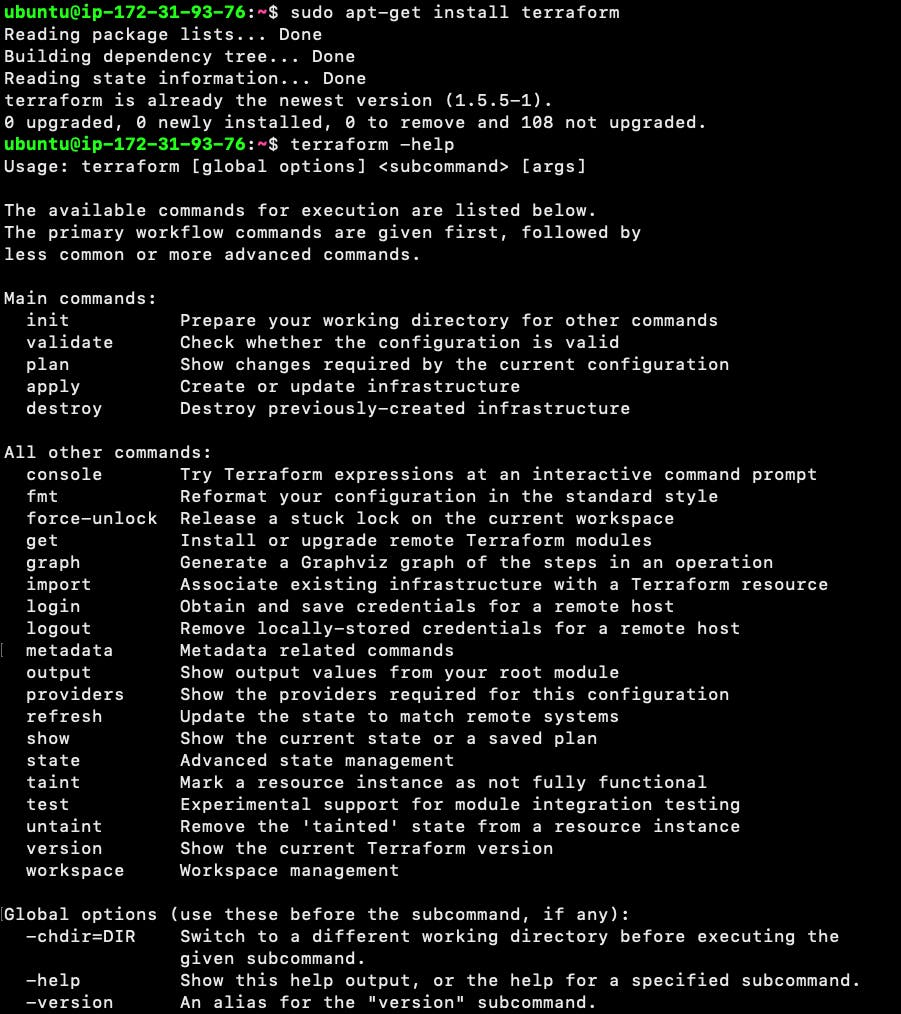
Congratulations you have successfully installed Terraform on the EC2 Instance 🎉
Setting up inbound rules for Jenkins
Now we need to access Jenkins on the browser.
In AWS your EC2 instance will not receive any traffic from the external world because all the inbound traffic rules are blocked by default, So we need set inbound rules manually.
First, use the given command to know the default port for Jenkins i.e. Port 8080.
ps -ef | grep jenkins
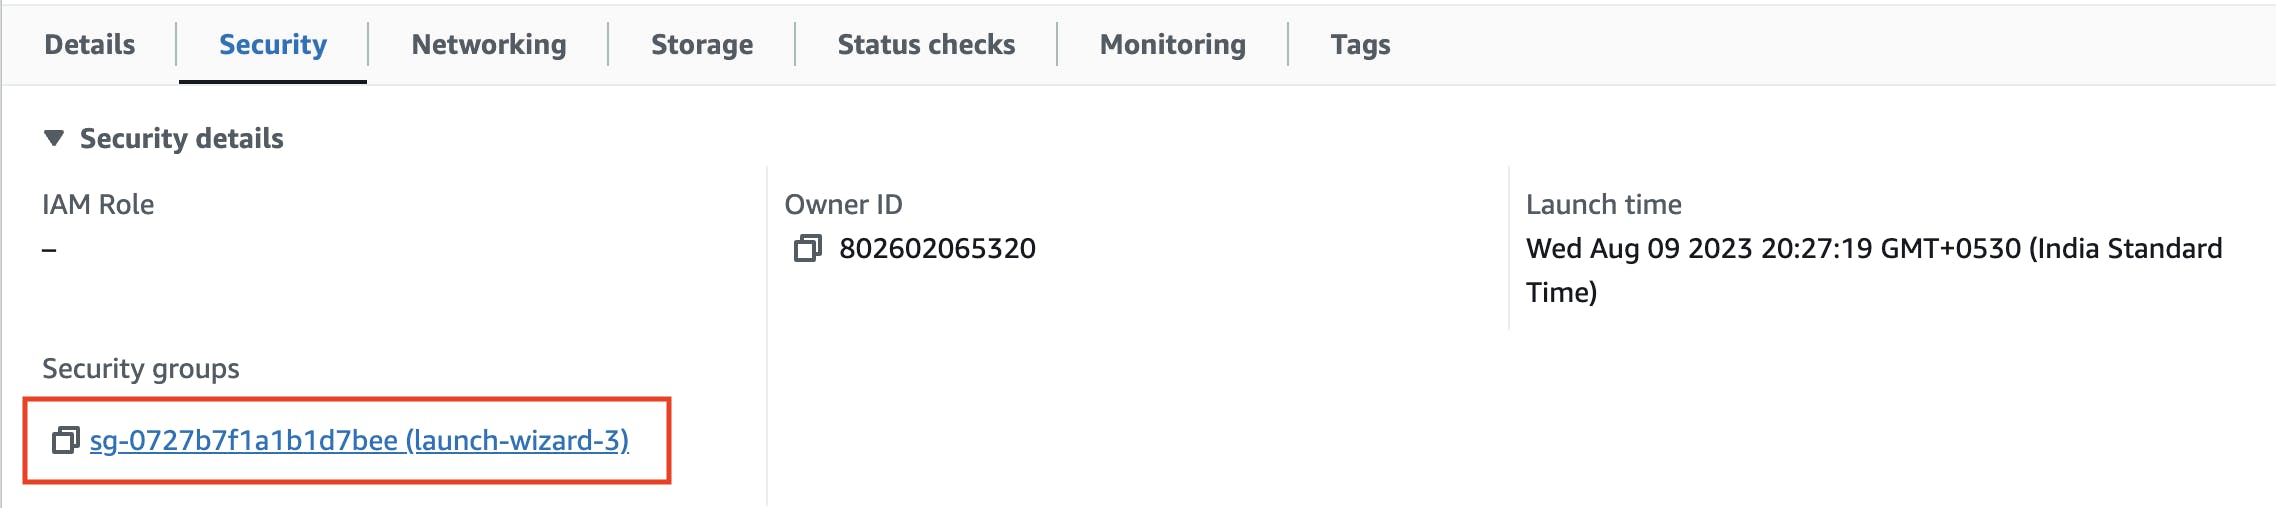
- To set Inbound rules, Go to the EC2 instance and click on the Security Groups tab, and then click on the default Security group.
- Now click on the Edit inbound rules on the right side of the page.

Now click on the Add rule button present on the bottom left of the page.
Now set the Port range to
8080and Source toAnywhere IPv4, and then click on the Save rules button on the bottom right of the page.

Congratulations you have successfully added inbound rules for Jenkins 🎉
Now you can access Jenkins on port 8080.
Just copy the Public IPv4 address of your instance and add :8080 at the end like this
184.72.69.93:8080

- Paste this IP address on the browser, and hit enter.

- Run the following command in your Terminal. This will return a Password for unlocking Jenkins.
sudo cat /var/lib/jenkins/secrets/initialAdminPassword

- Now copy the password, paste it into the text box, and click on the Continue button.
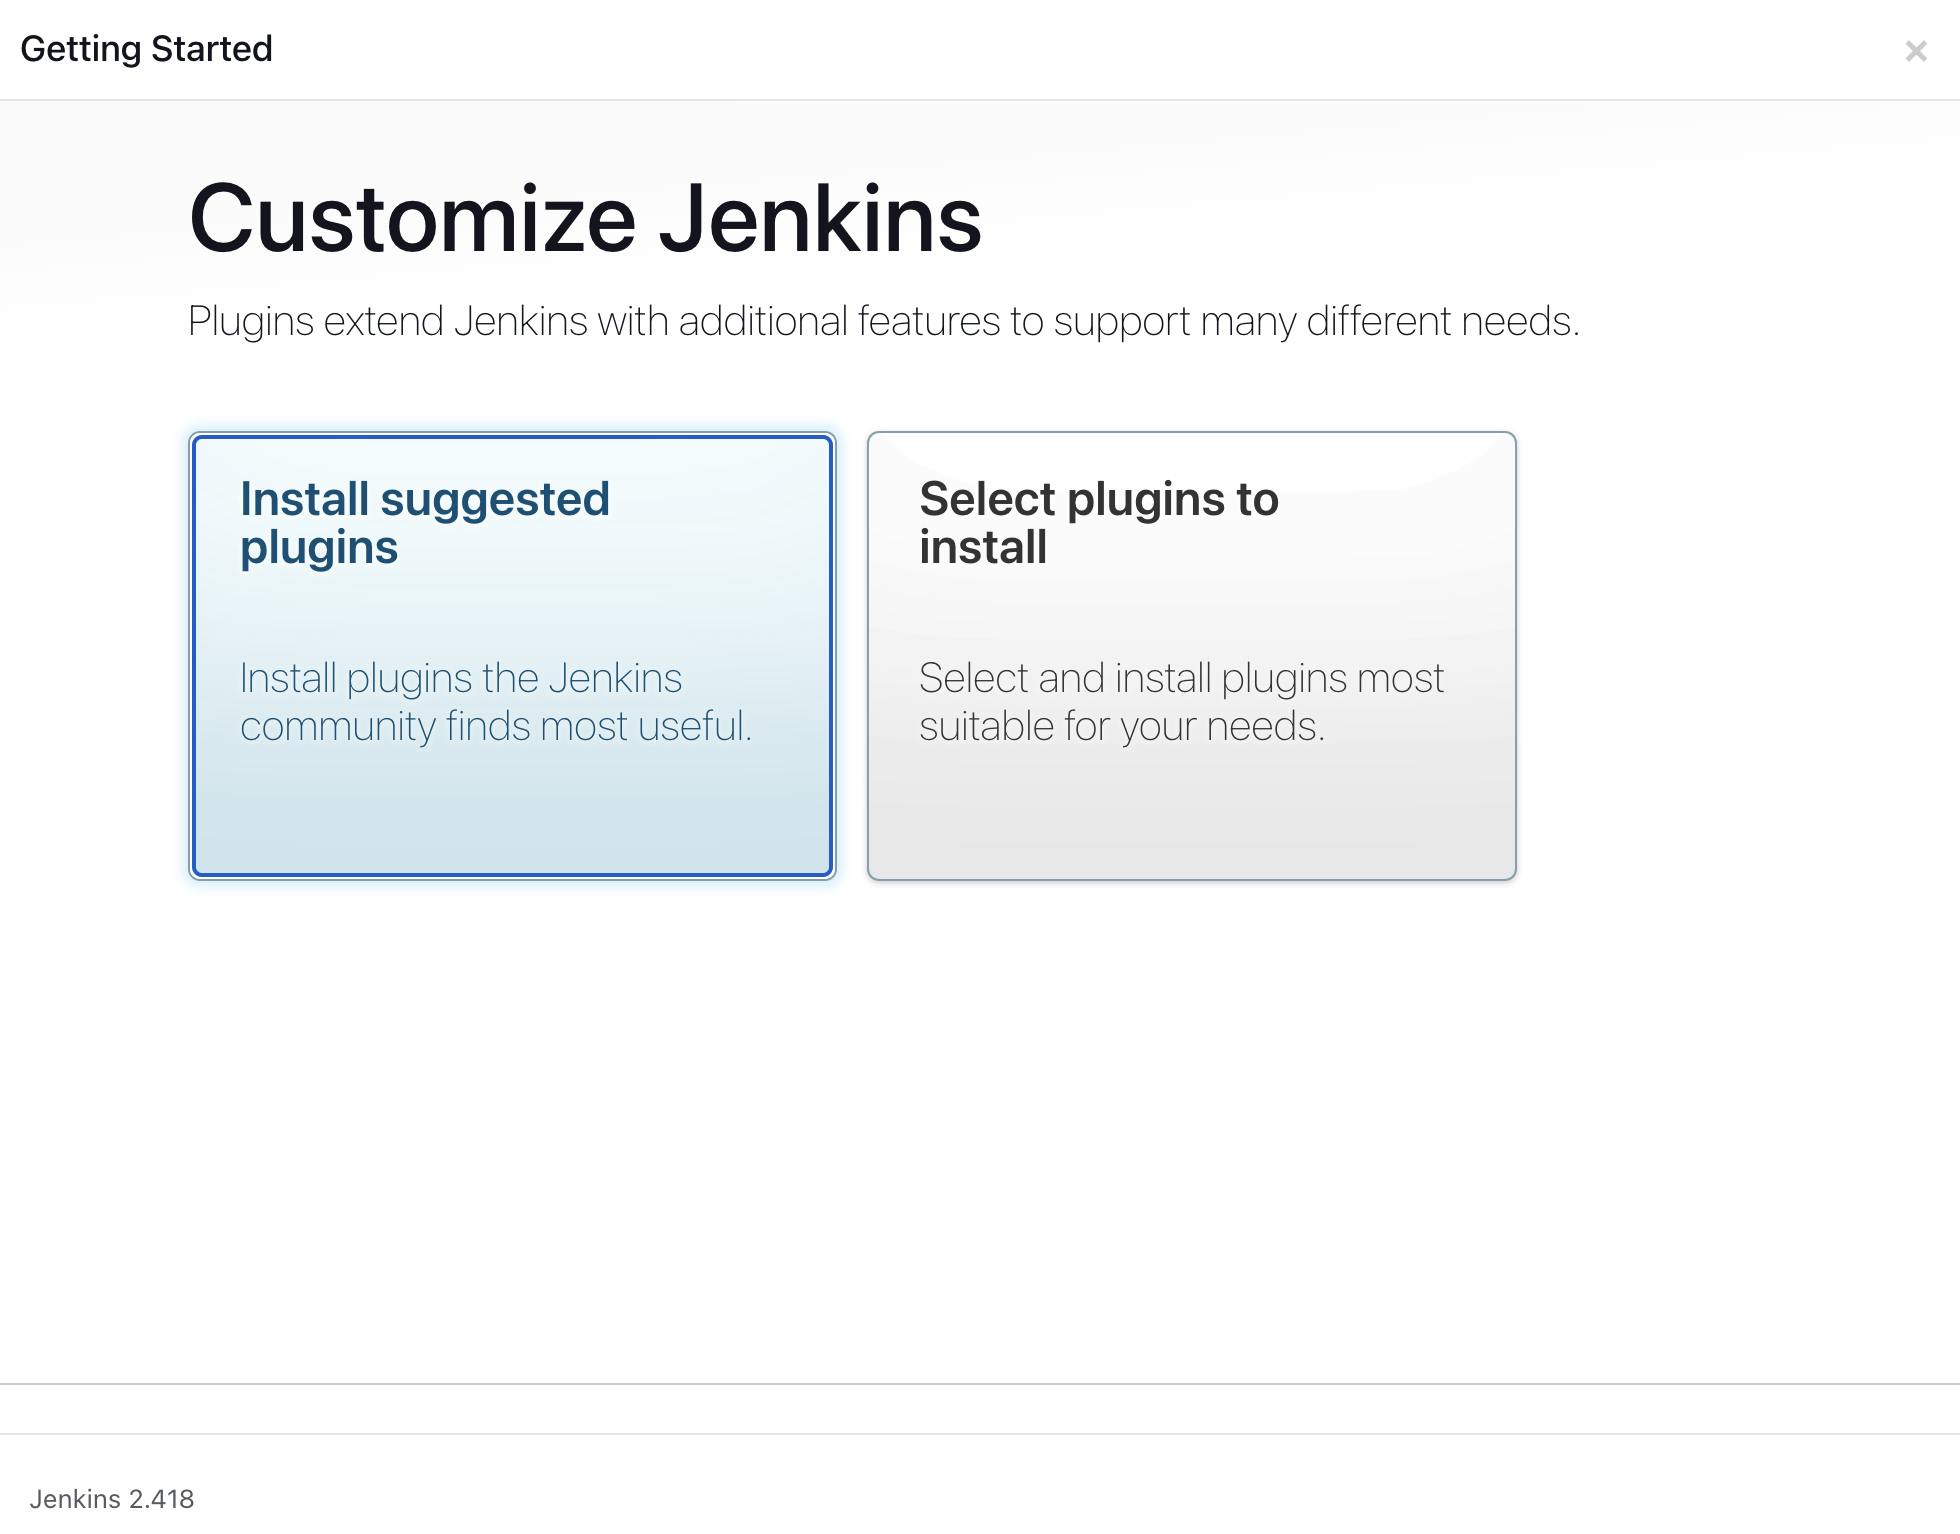
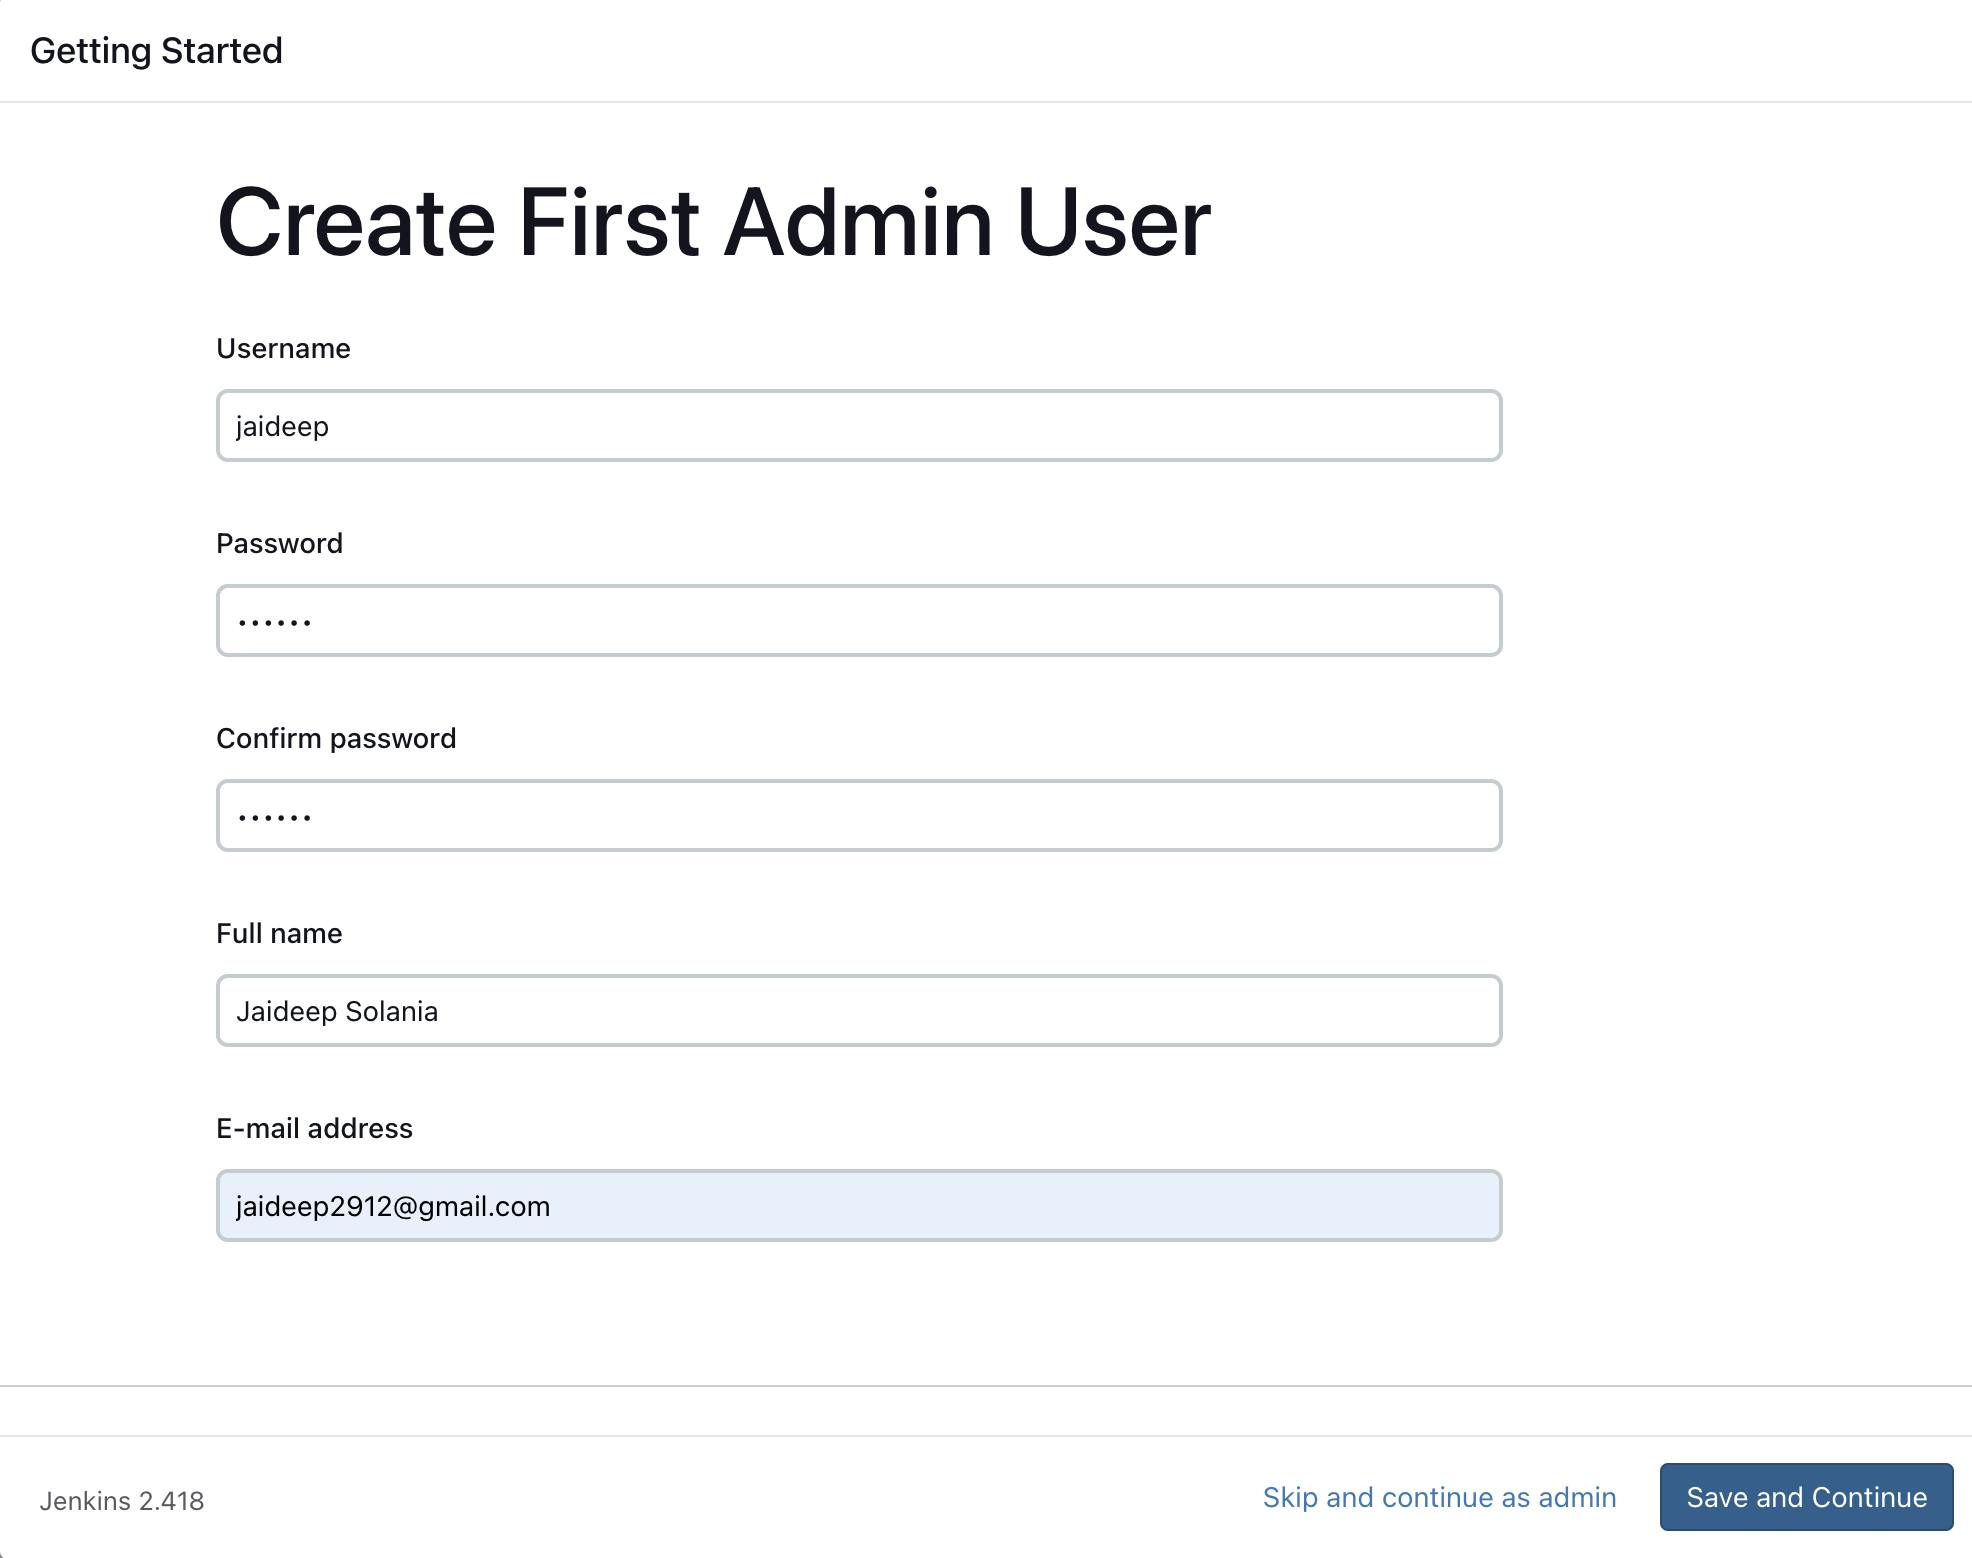
Manage some Jenkins plugins
- Click on Install suggested plugins.
- After installing plugins, You have to create First Admin User.
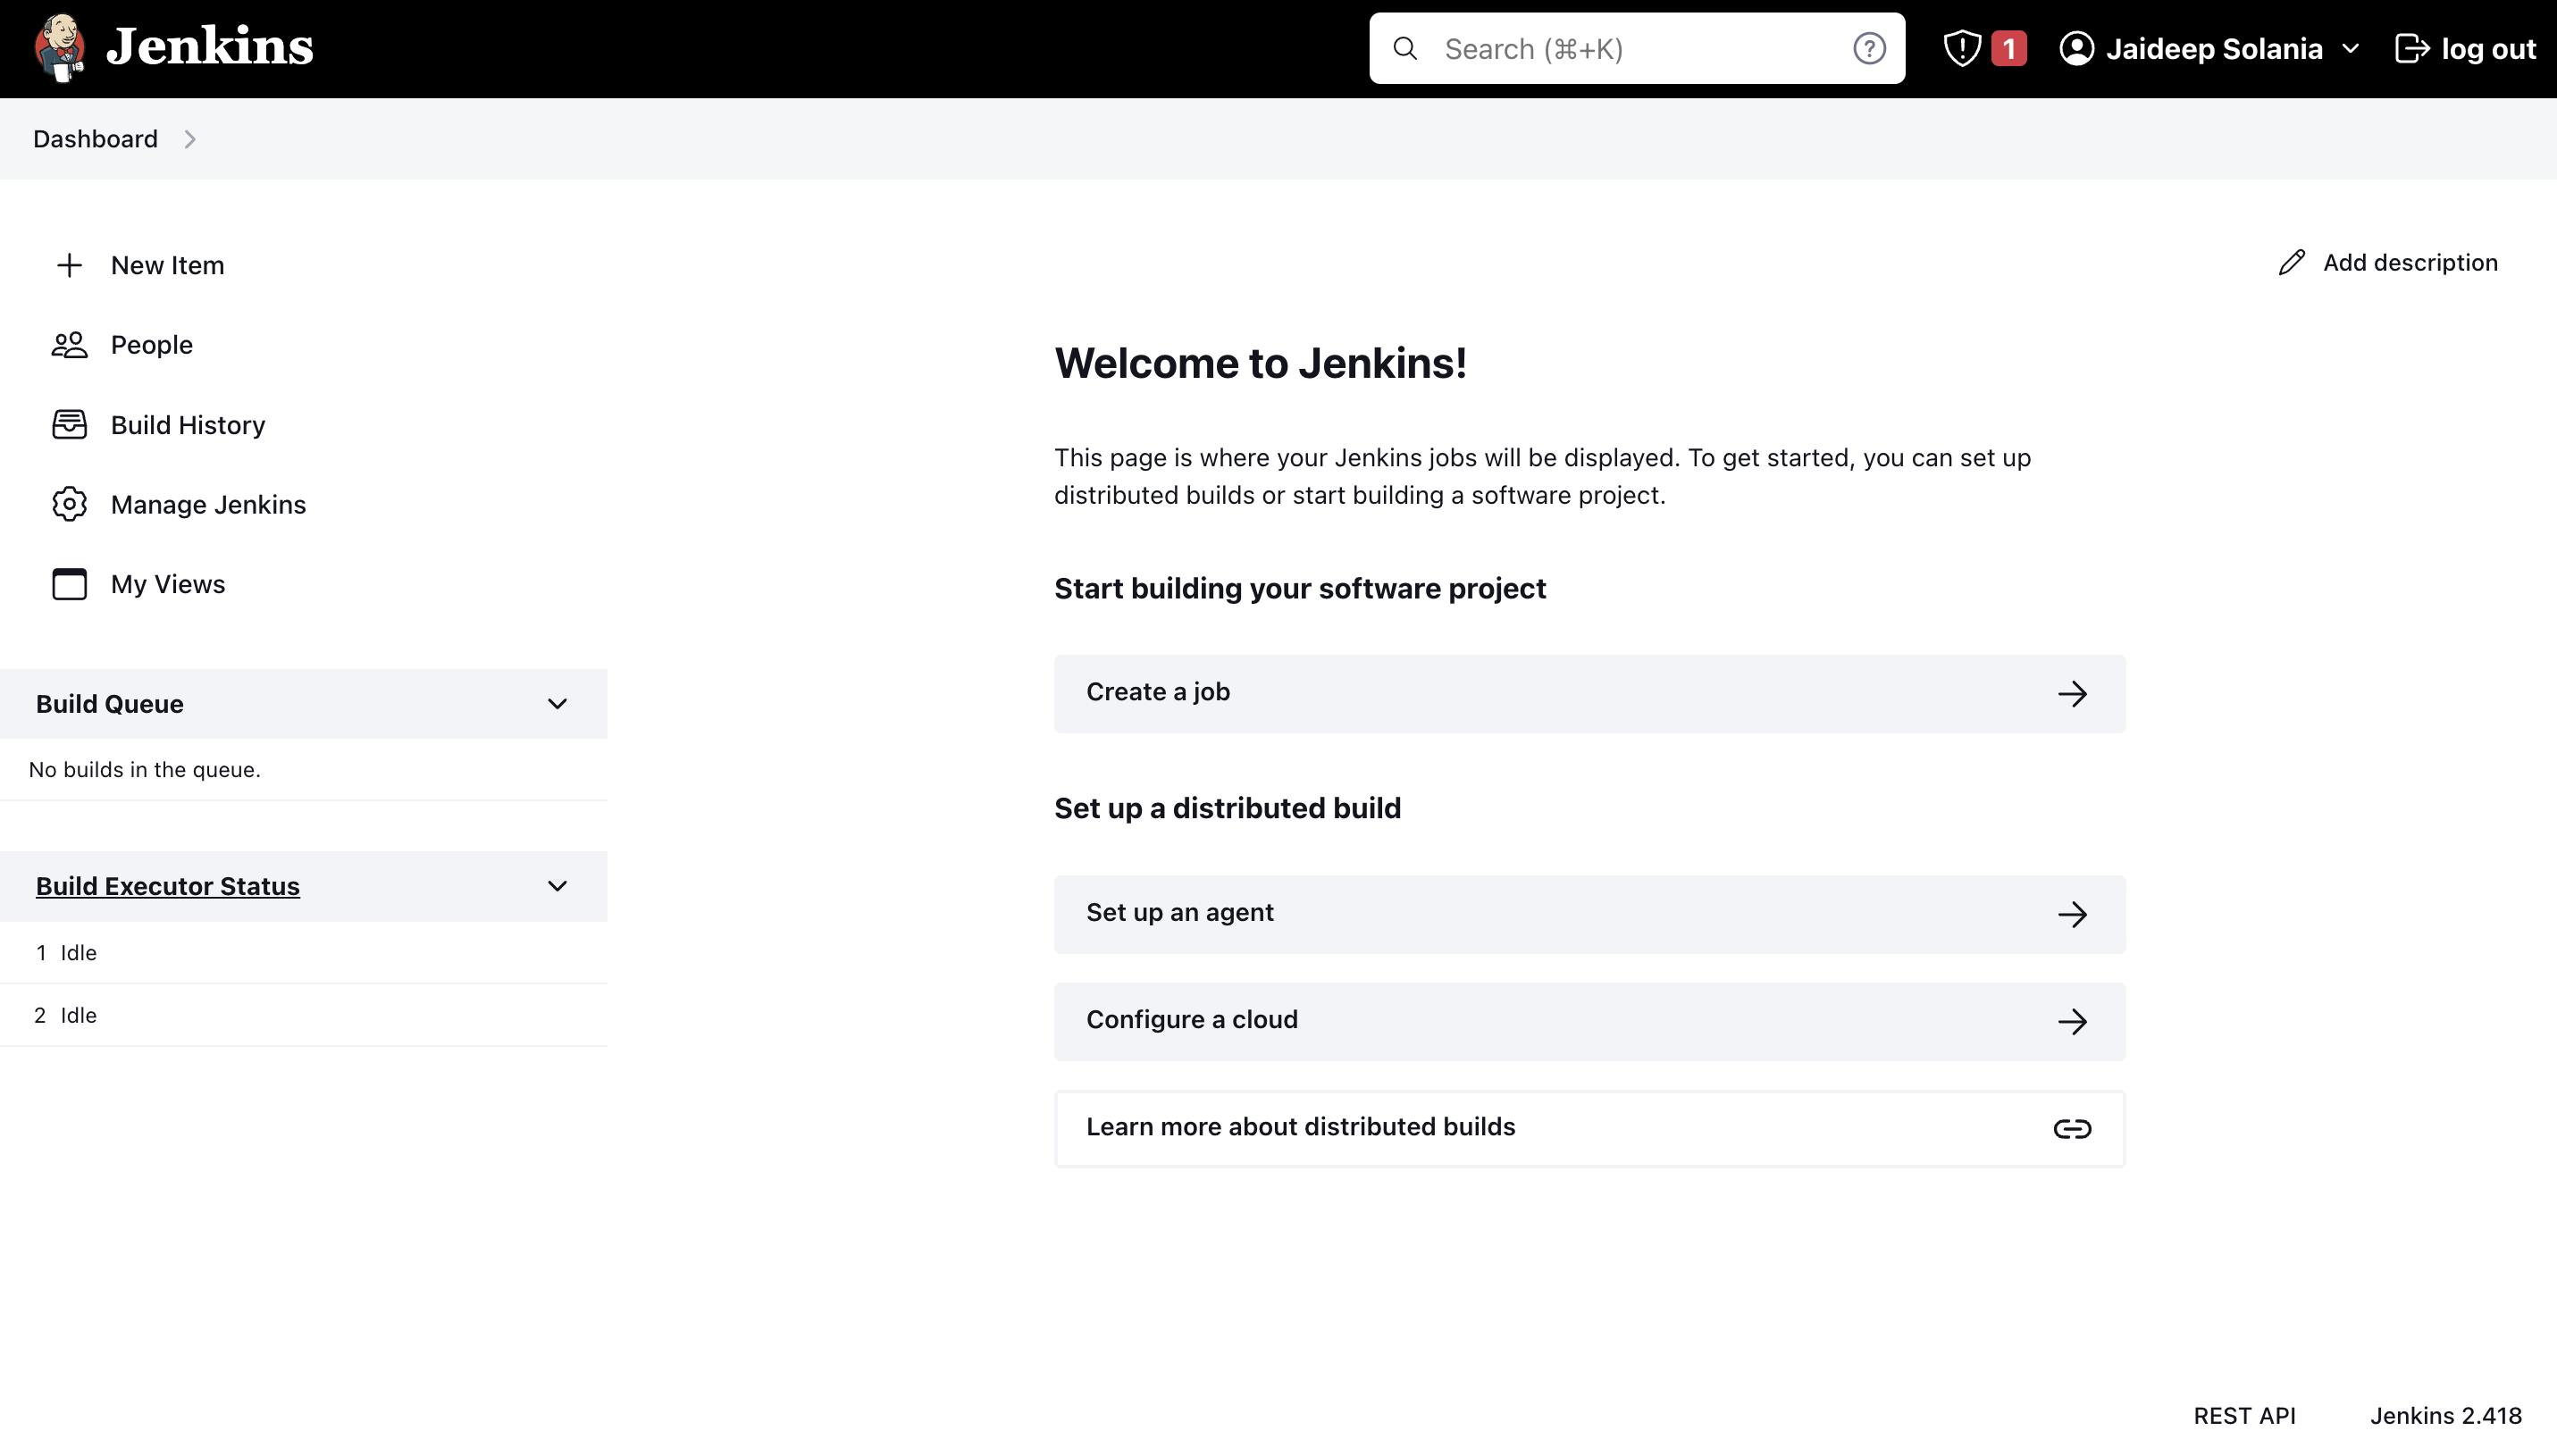
Congratulations you are ready to use Jenkins 🎉
Create an IAM User on AWS
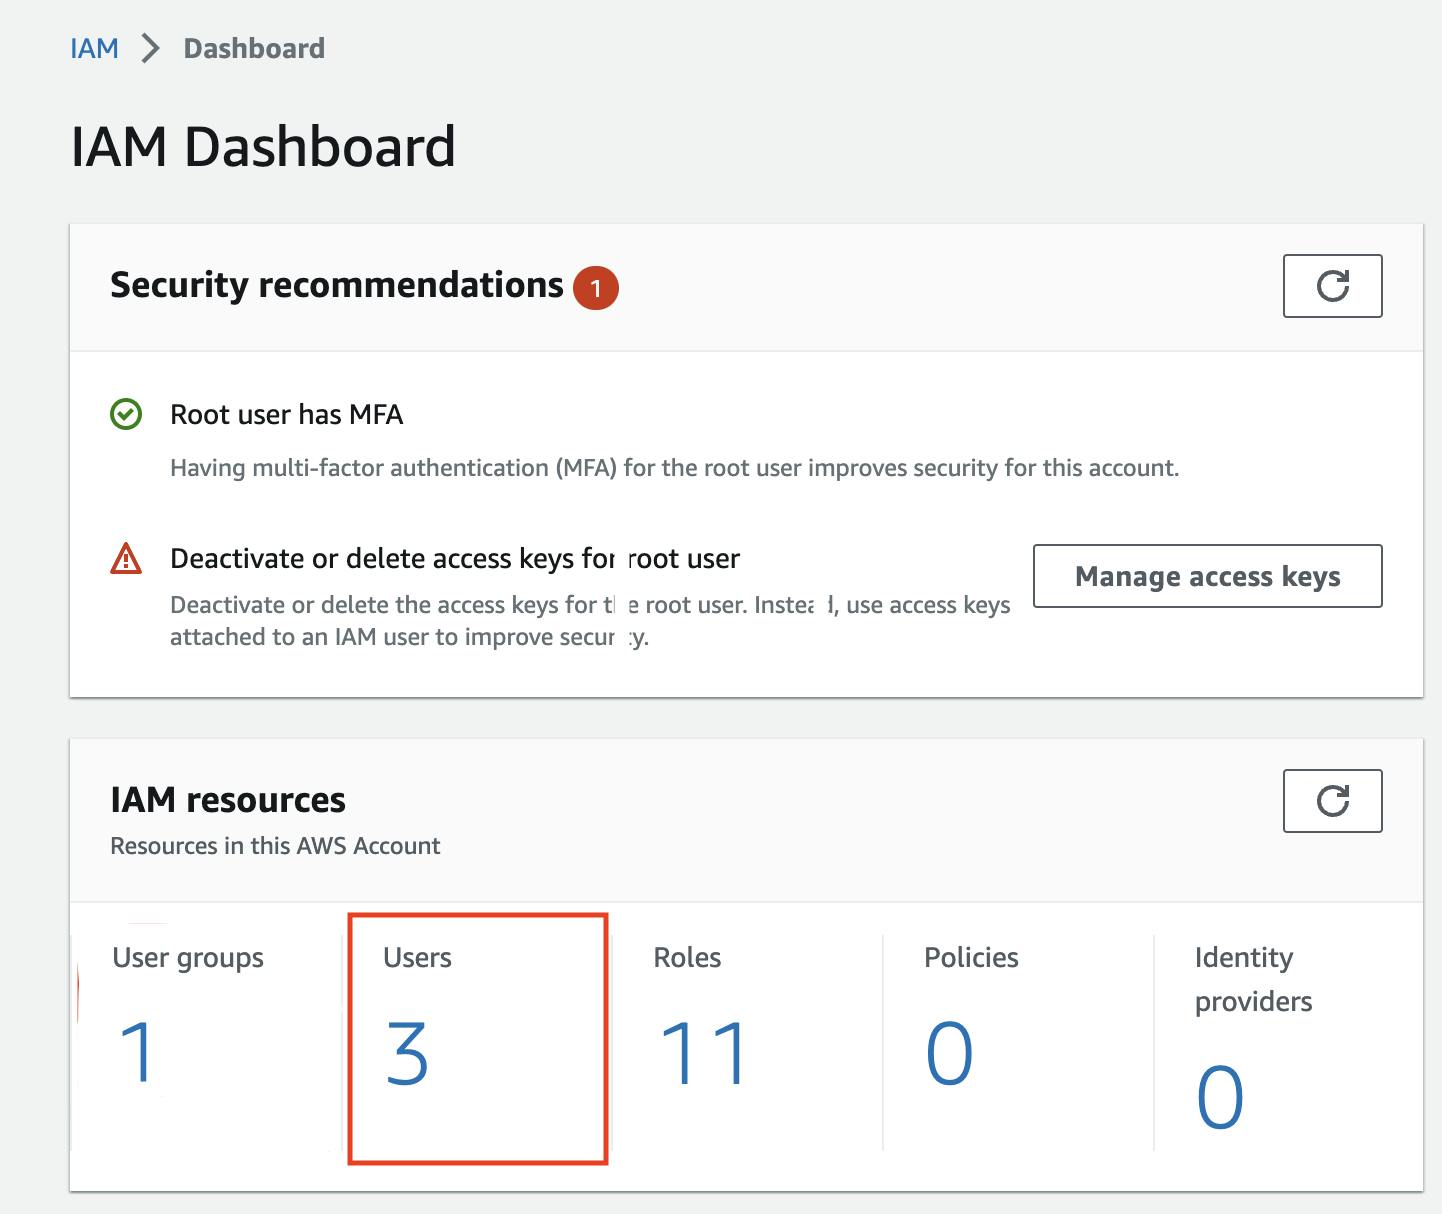
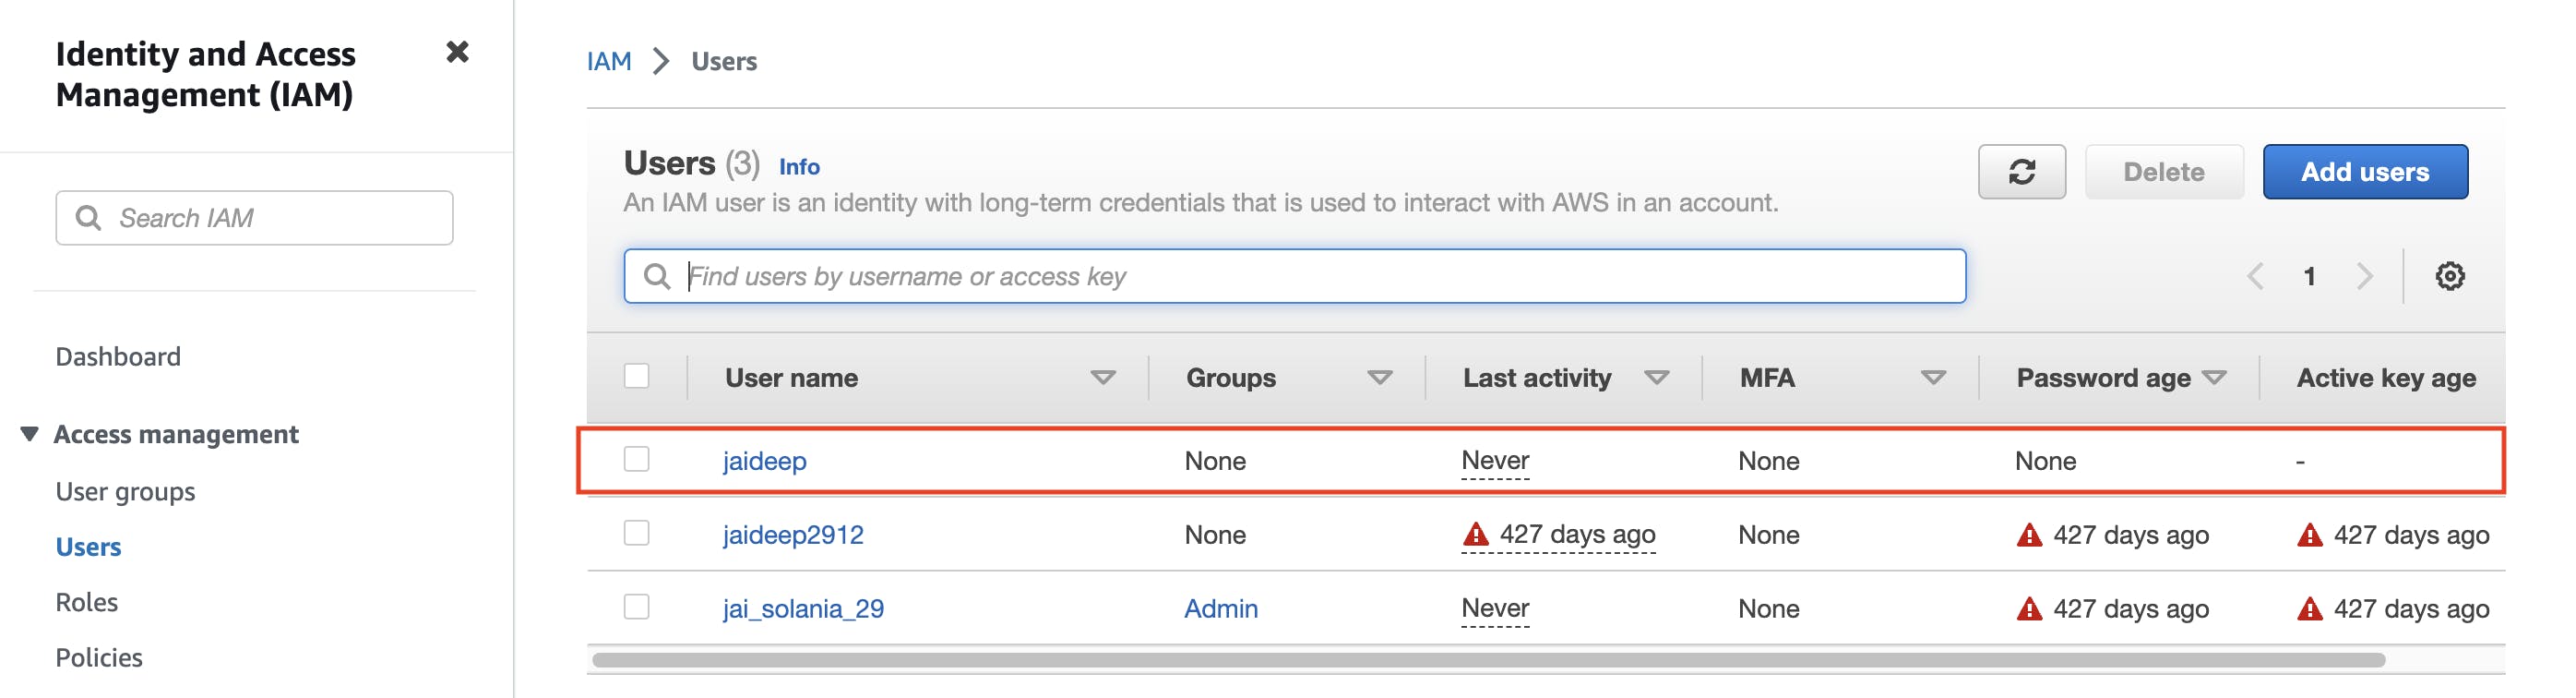
- Search and go to IAM Dashboard on AWS, and then click on Users.
- Click on the Add users button on the top right of the page.

- Give the new user a User name and click Next, leaving other fields as default.

- On the next page, select Attach policies directly option, and then add AdministratorAccess as a Policy.

Now review the details and click on the Create user button on the bottom right of the page.
You can now see the newly created user on the IAM Users Dashboard.
Congratulations you have successfully created a new IAM user 🎉
Generate Access Key for IAM User on AWS
Once you click on the new user, you will see the details of the user.
Go to the Security credentials tab and click on the Create access key button.

- Choose Command Line Interface (CLI) and click next.

- Set the description tag to the access key and click on the Create access key button.

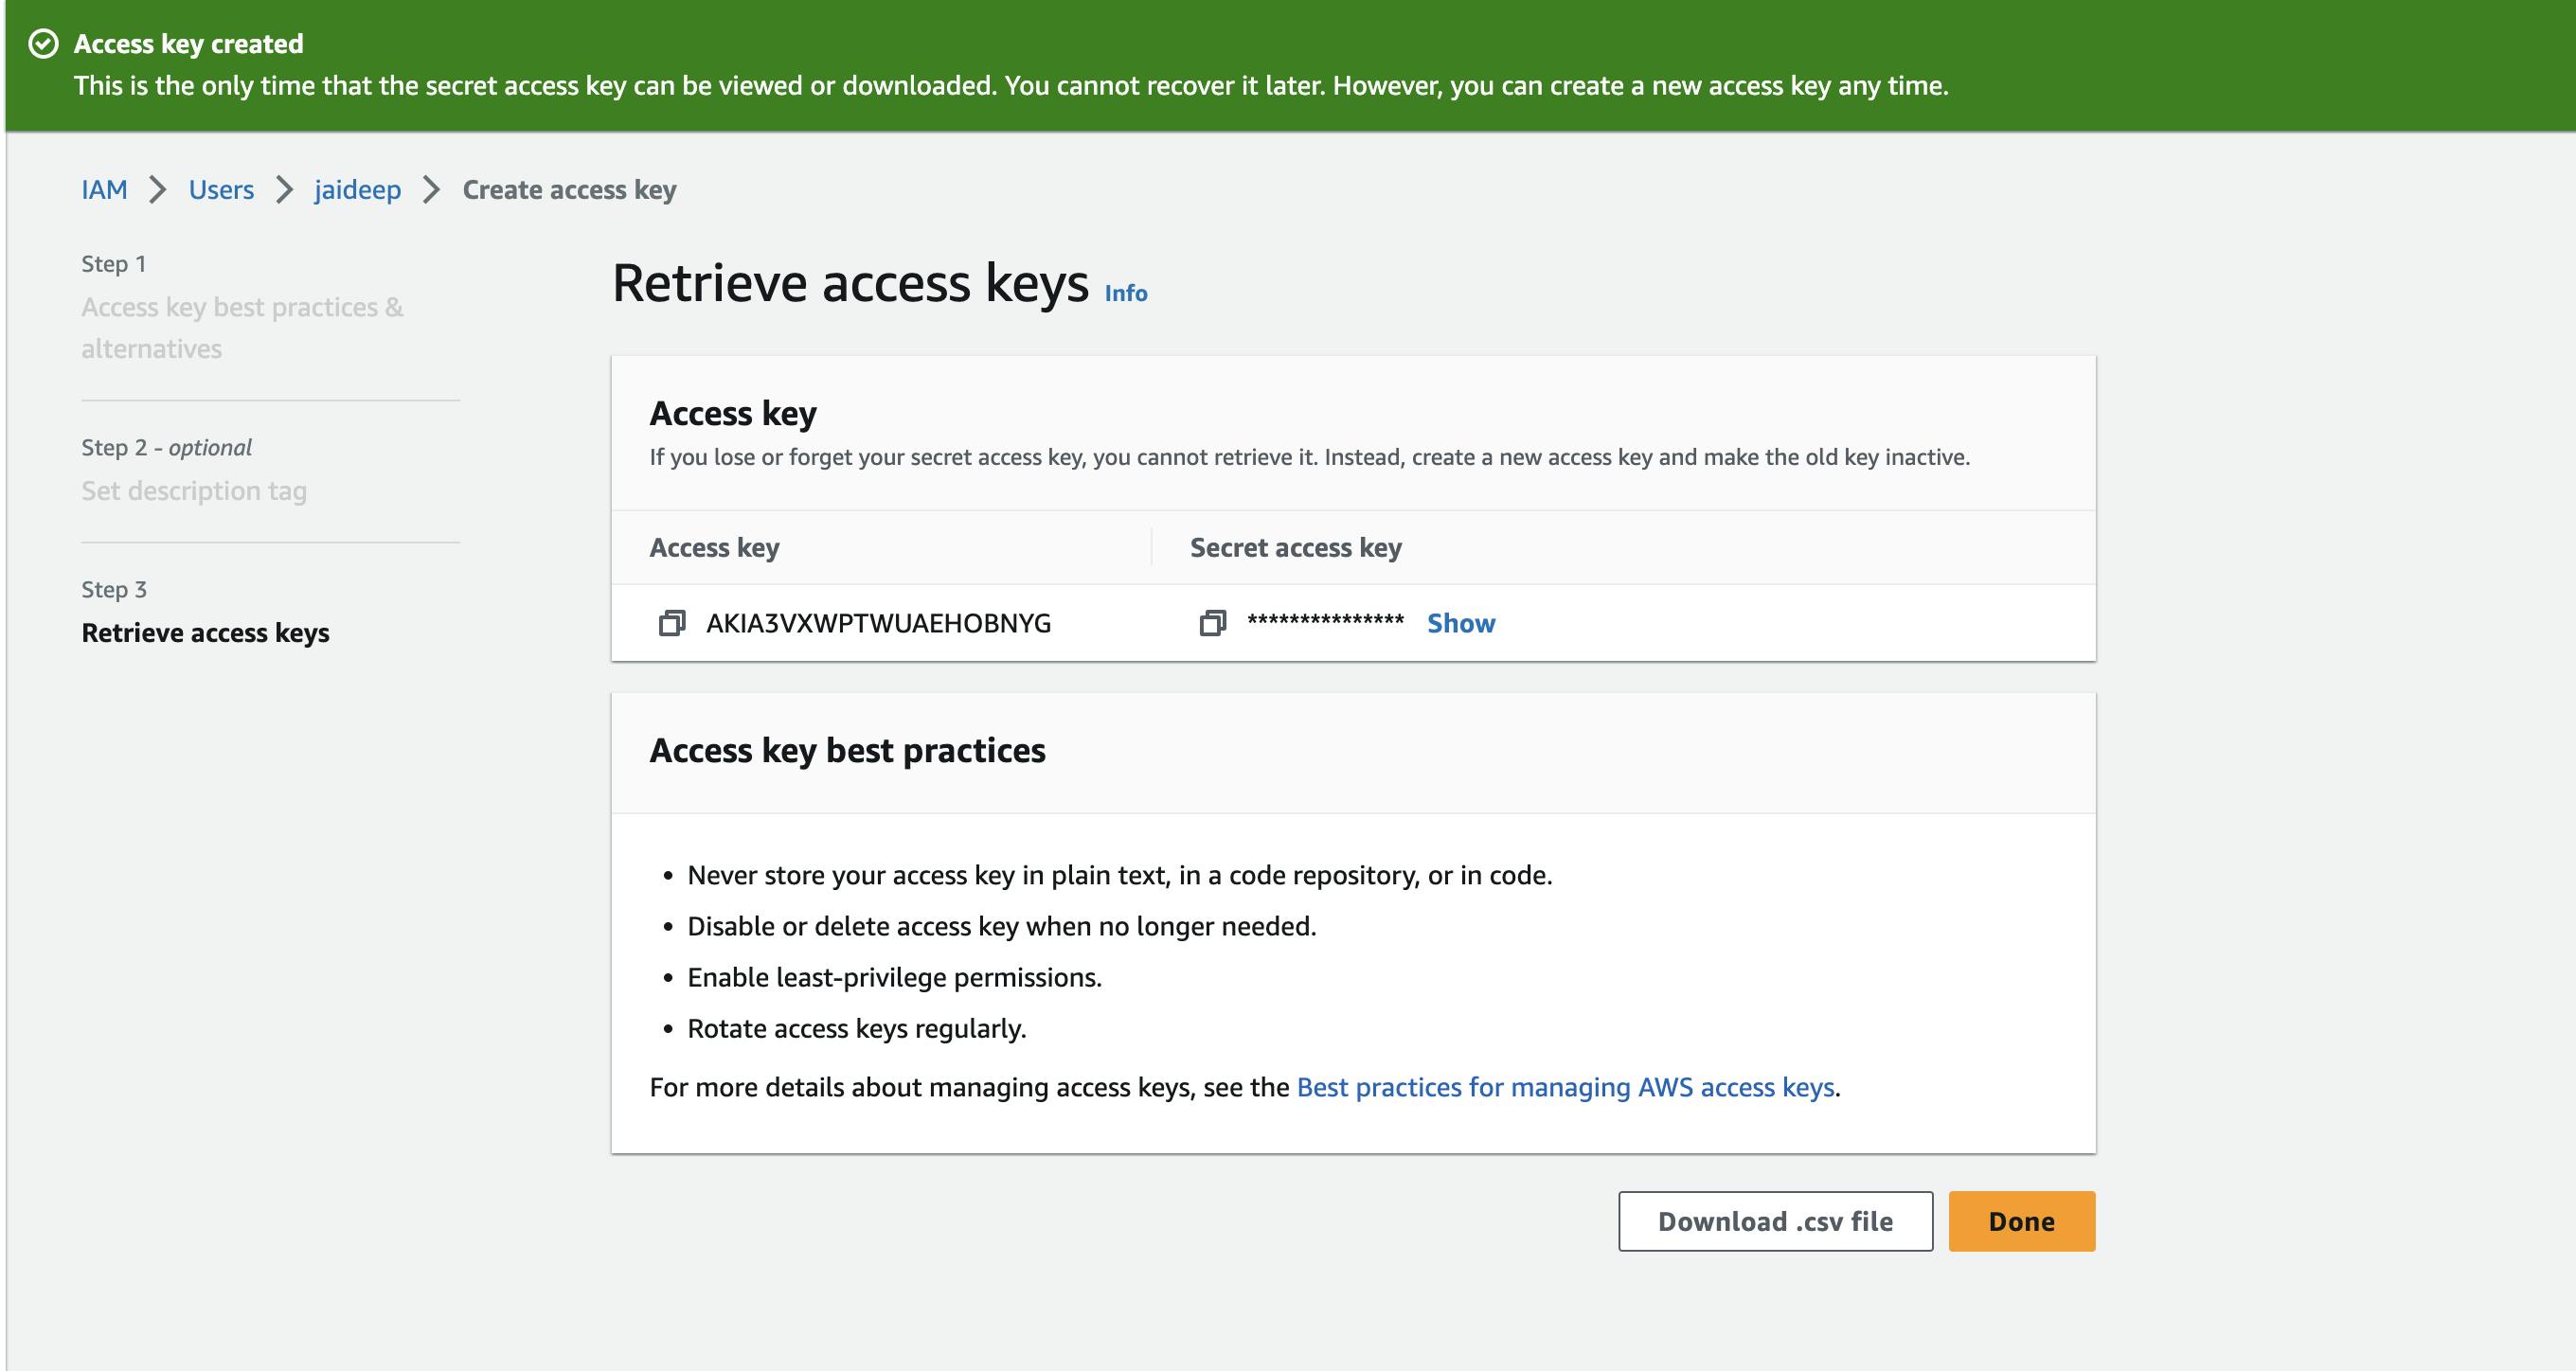
Note: Keep the above Access key page open because you are going to need the Secret access key value in upcoming steps.
Congratulations you have successfully generated the Access key for IAM User 🎉
Add credentials in Jenkins
Environment Variable in Jenkinsfile:

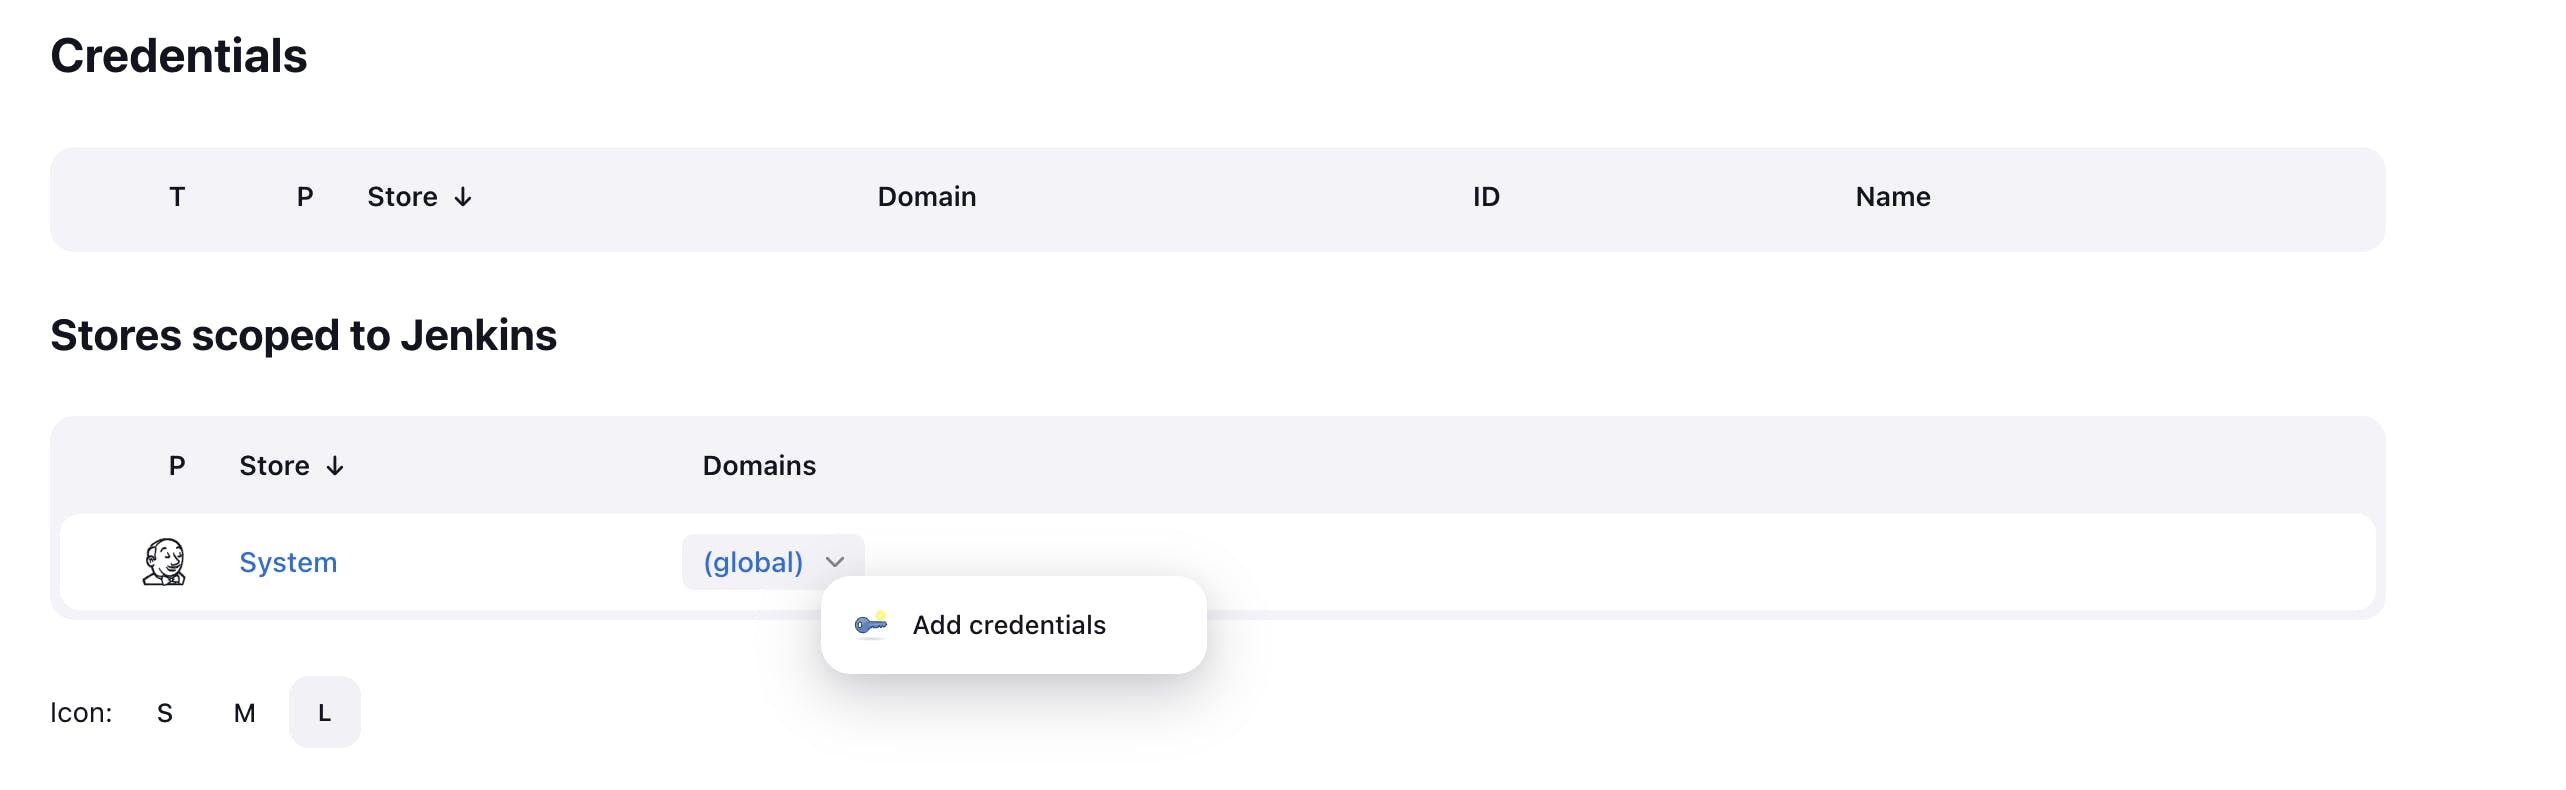
- Go to Jenkins > Manage Jenkins > Credentials and then Click on Add credentials.
Now the New credentials page will open, fill in the input fields accordingly.
Copy the value of the Access key from AWS and paste it in the text box of Secret, ID should be exactly the same according to the
Environment variablein Jenkinsfile.


The Access key is now added as a credential in Jenkins, Now you need to add the Secret access key as a credential.
Simply click on the Add credentials button on the top right of the page.
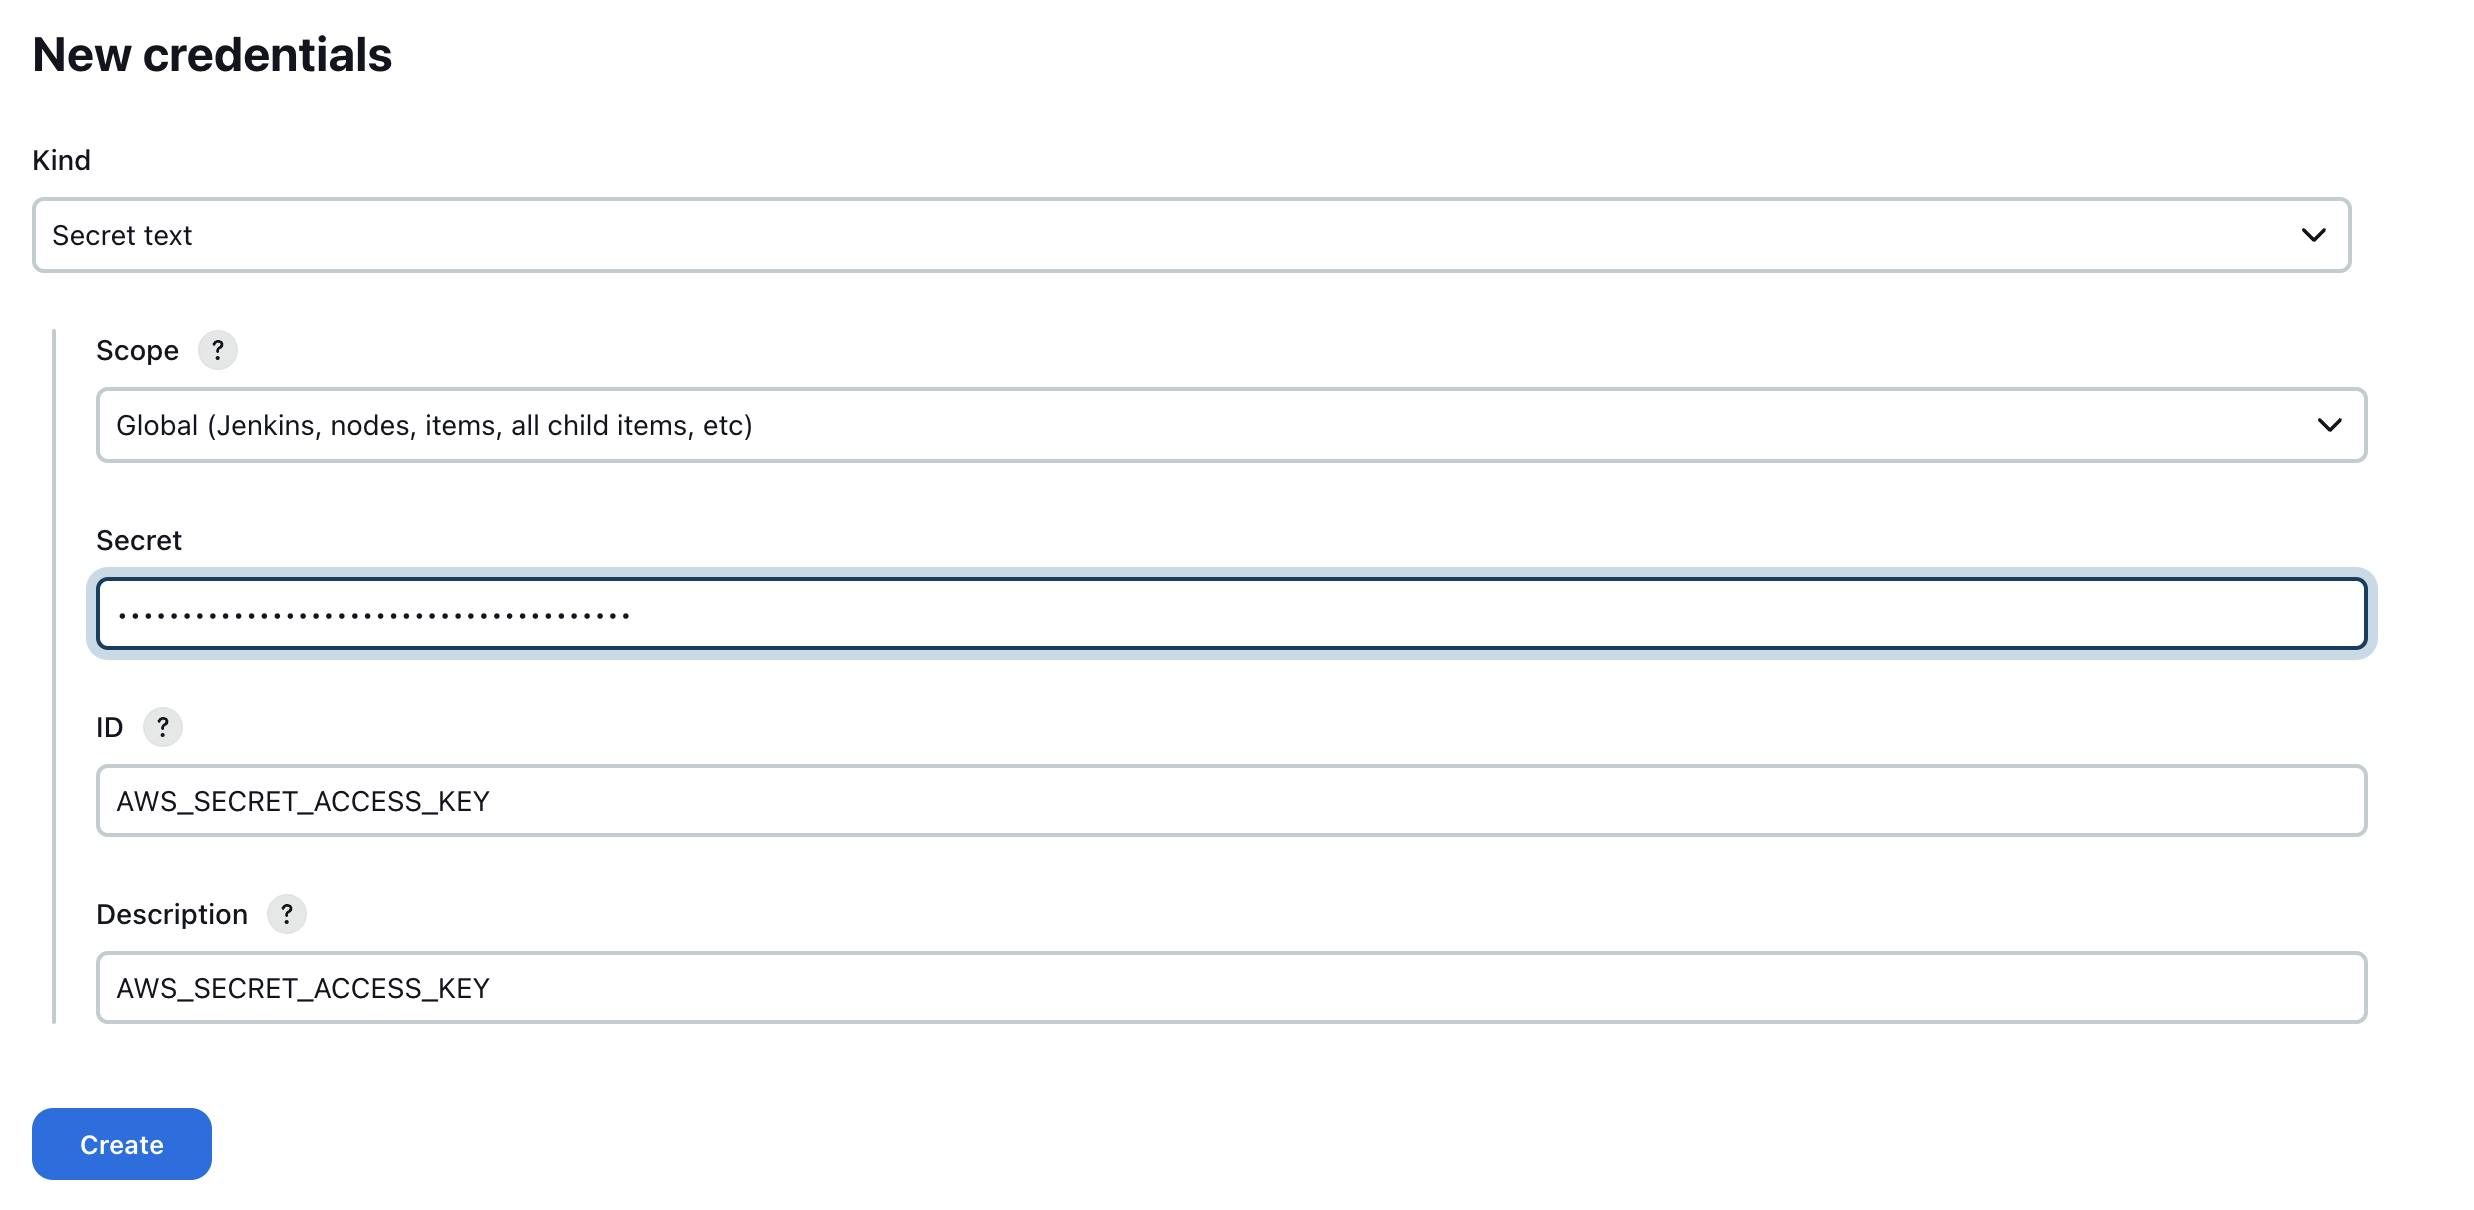
All the input fields will be the same as before except Secret, ID, and Description.
Copy the value of the Secret access key from AWS and paste it in the text box of Secret, ID should be exactly the same according to the
Environment variablein Jenkinsfile.

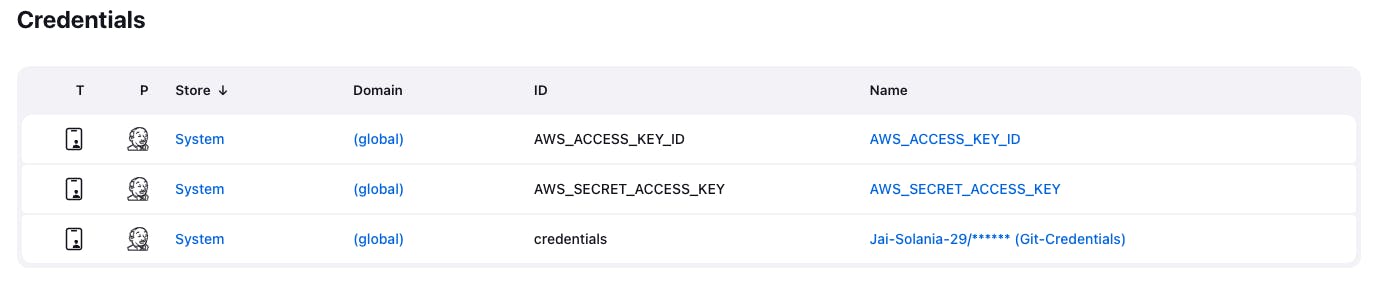
The Access key and Secret access key both are now added as credentials in Jenkins.
Now you need to add Git credentials in Jenkins.
Simply click on the Add new credentials button and fill in the input fields accordingly.
Choose
Username and Passwordas Kind,Globalas Scope, enter your GitHub username in Username, your GitHub password in Password, and enter Git-Credentials in ID and Description.

- All the required credentials are now added to Jenkins.
Create a Pipeline in Jenkins
Now it's time to finally build the pipeline in Jenkins which will trigger the workflow.
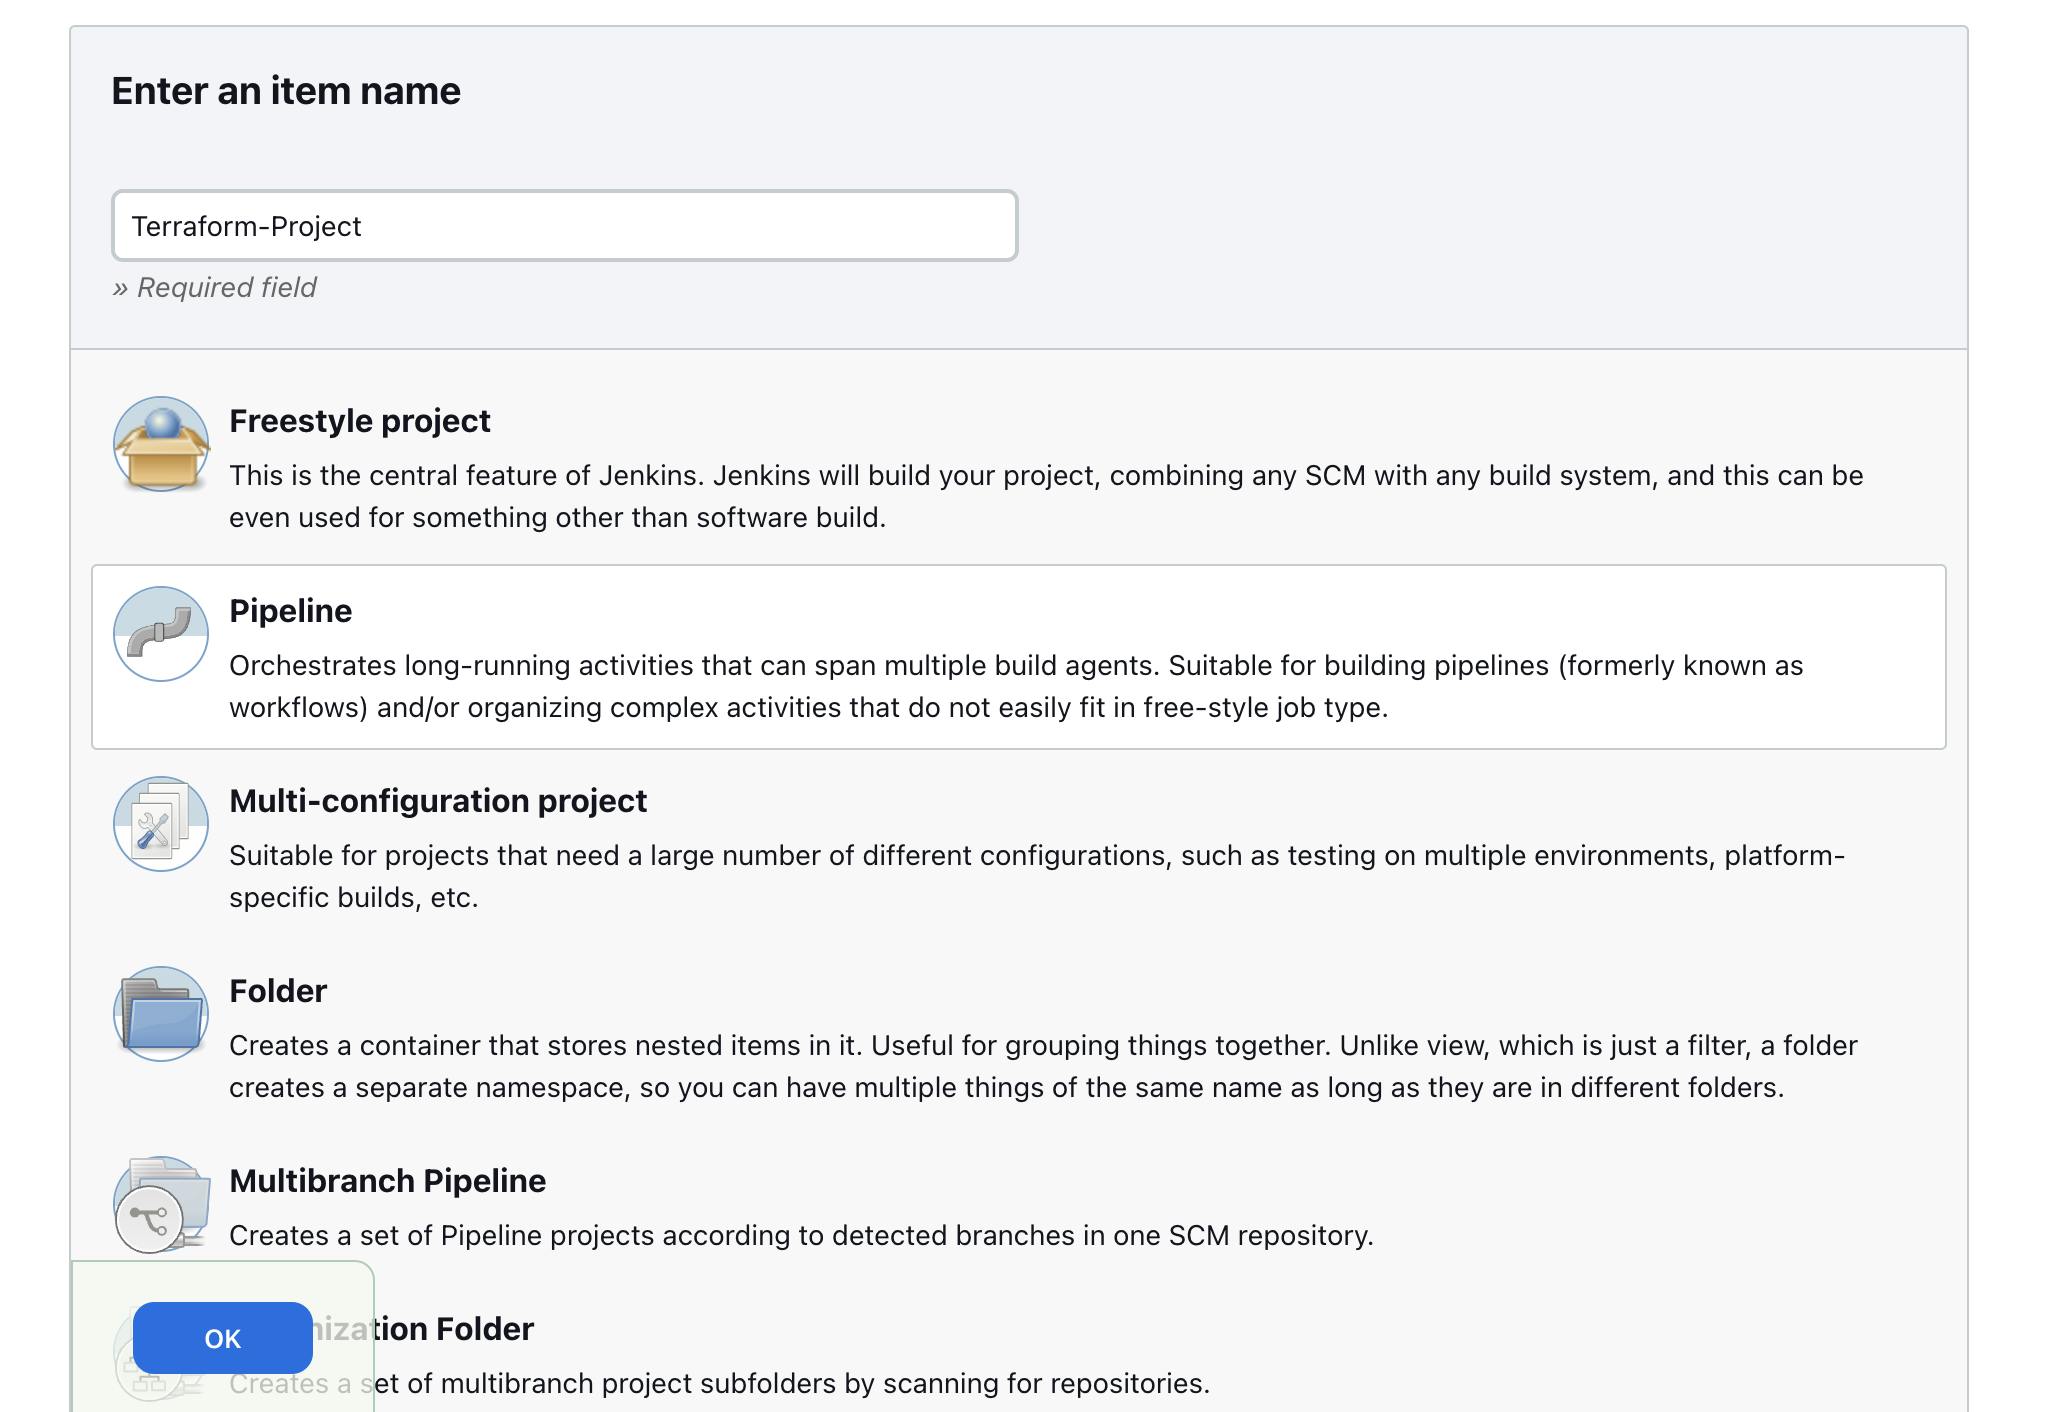
Go to Jenkins Dashboard > New Item.
Give the new item a name, in my case, it's Terraform-Project, Select Pipeline as the type of item and then click OK.
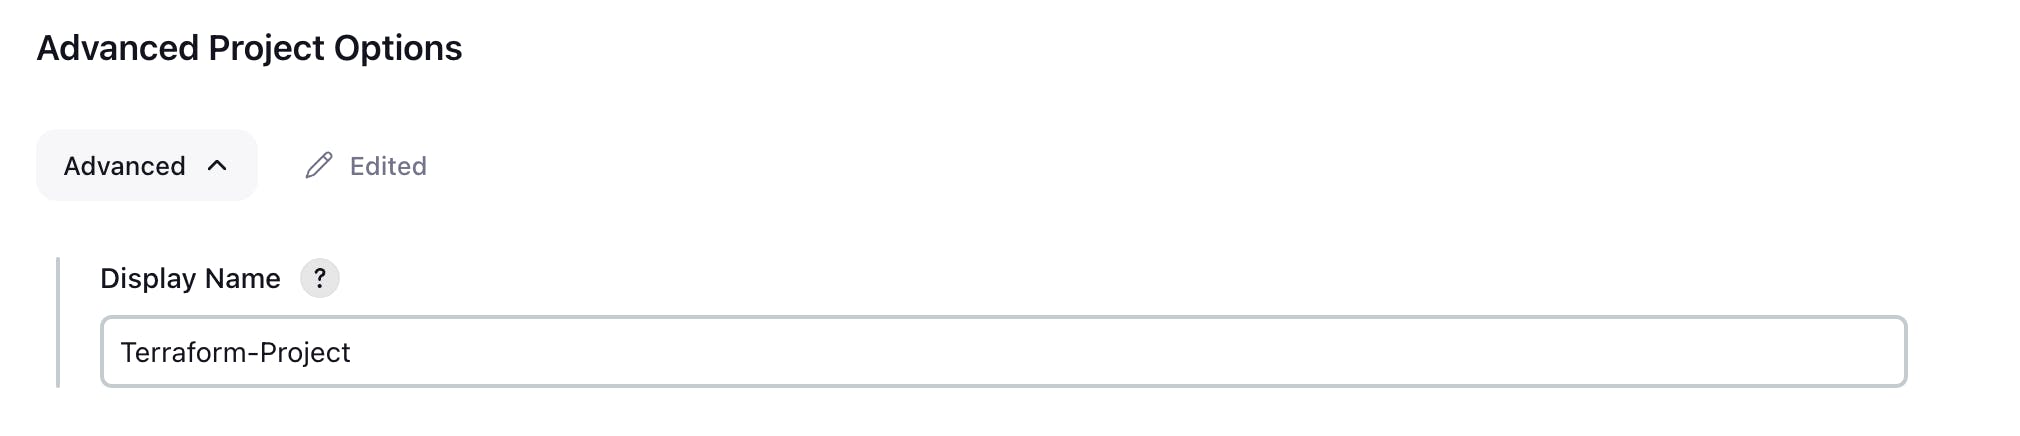
- In the Advanced Project Options write the same name i.e. Terraform-Project as the Display Name.
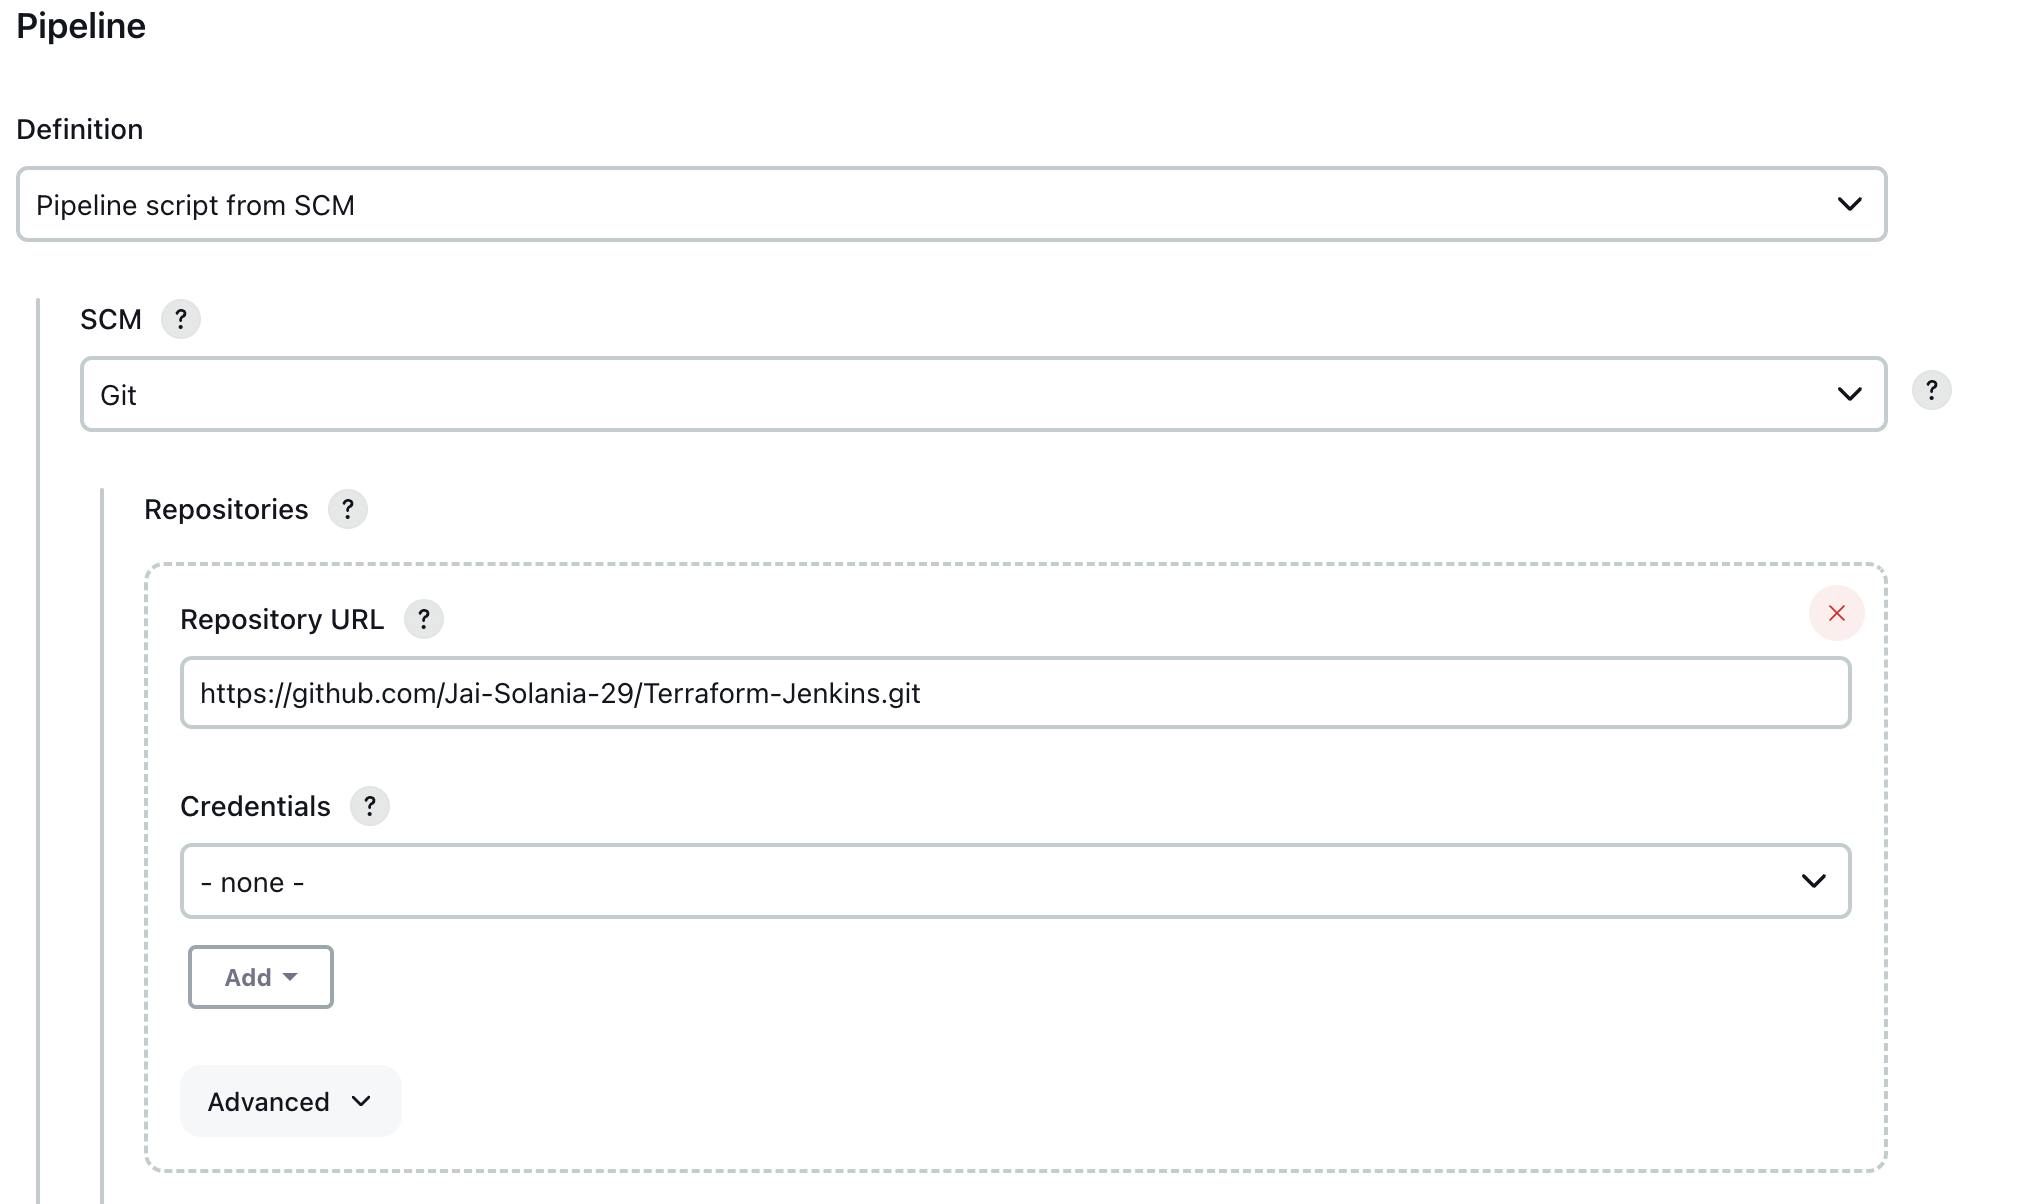
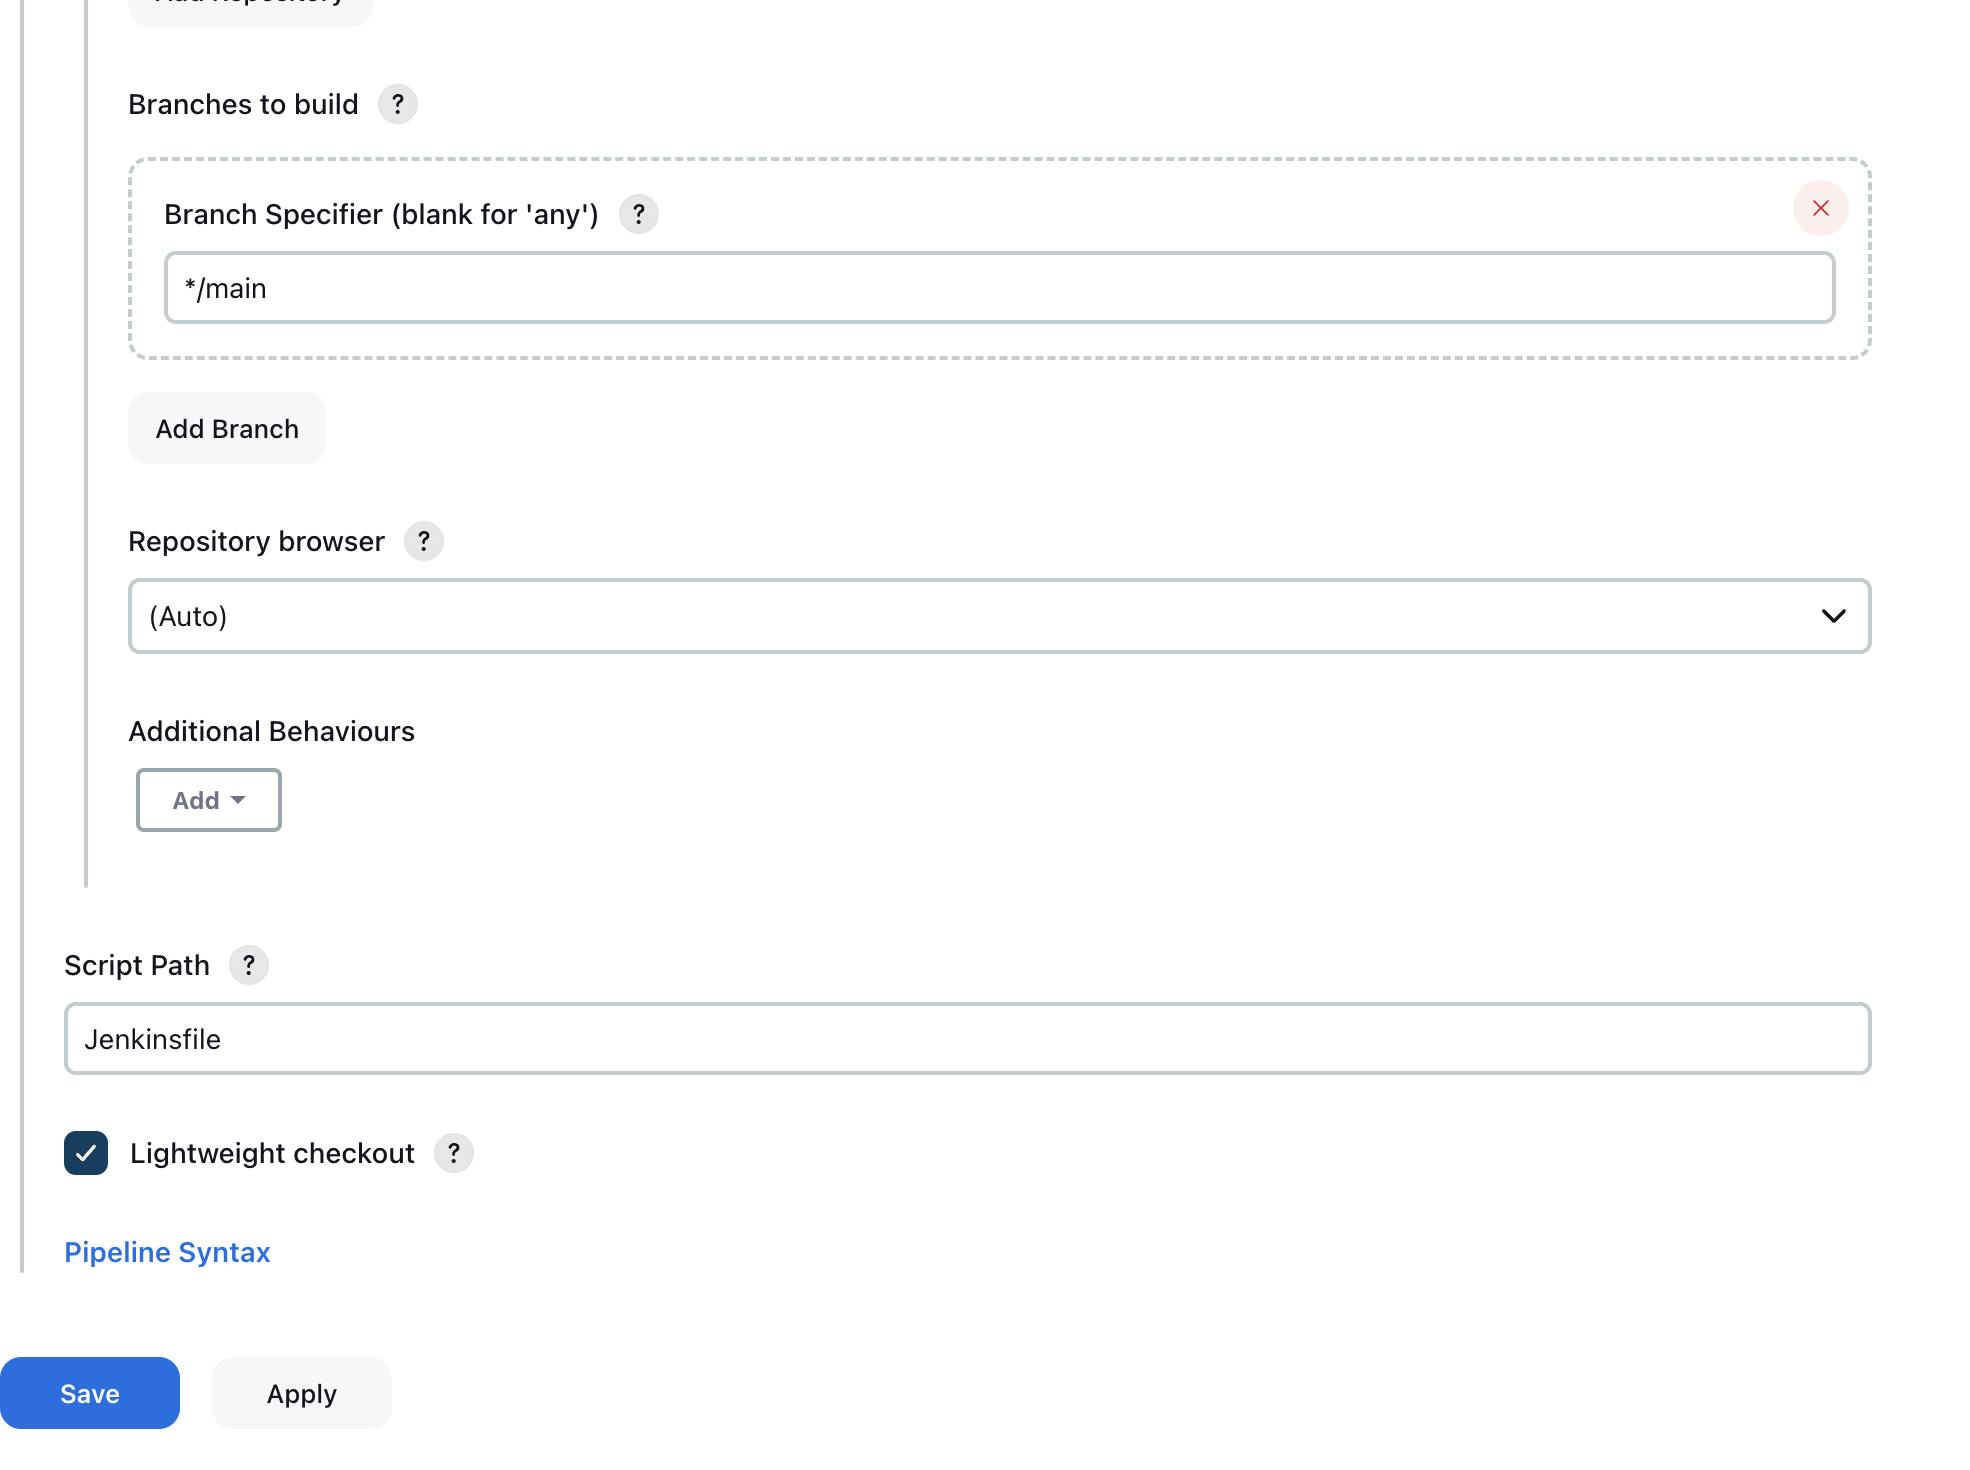
- In the Pipeline section select
Pipeline script from SCMas Definition,Gitas SCM, enter your GitHub repository URL,*/mainor*/masteras Branch Specifier in my case it's main, enterJenkinsfileas Script Path, and then click on Apply > Save.
Congratulations you have successfully created a Pipeline in Jenkins 🎉
Initialize the Build
- Now you need to test it, Click on Build Now to initialize the build.
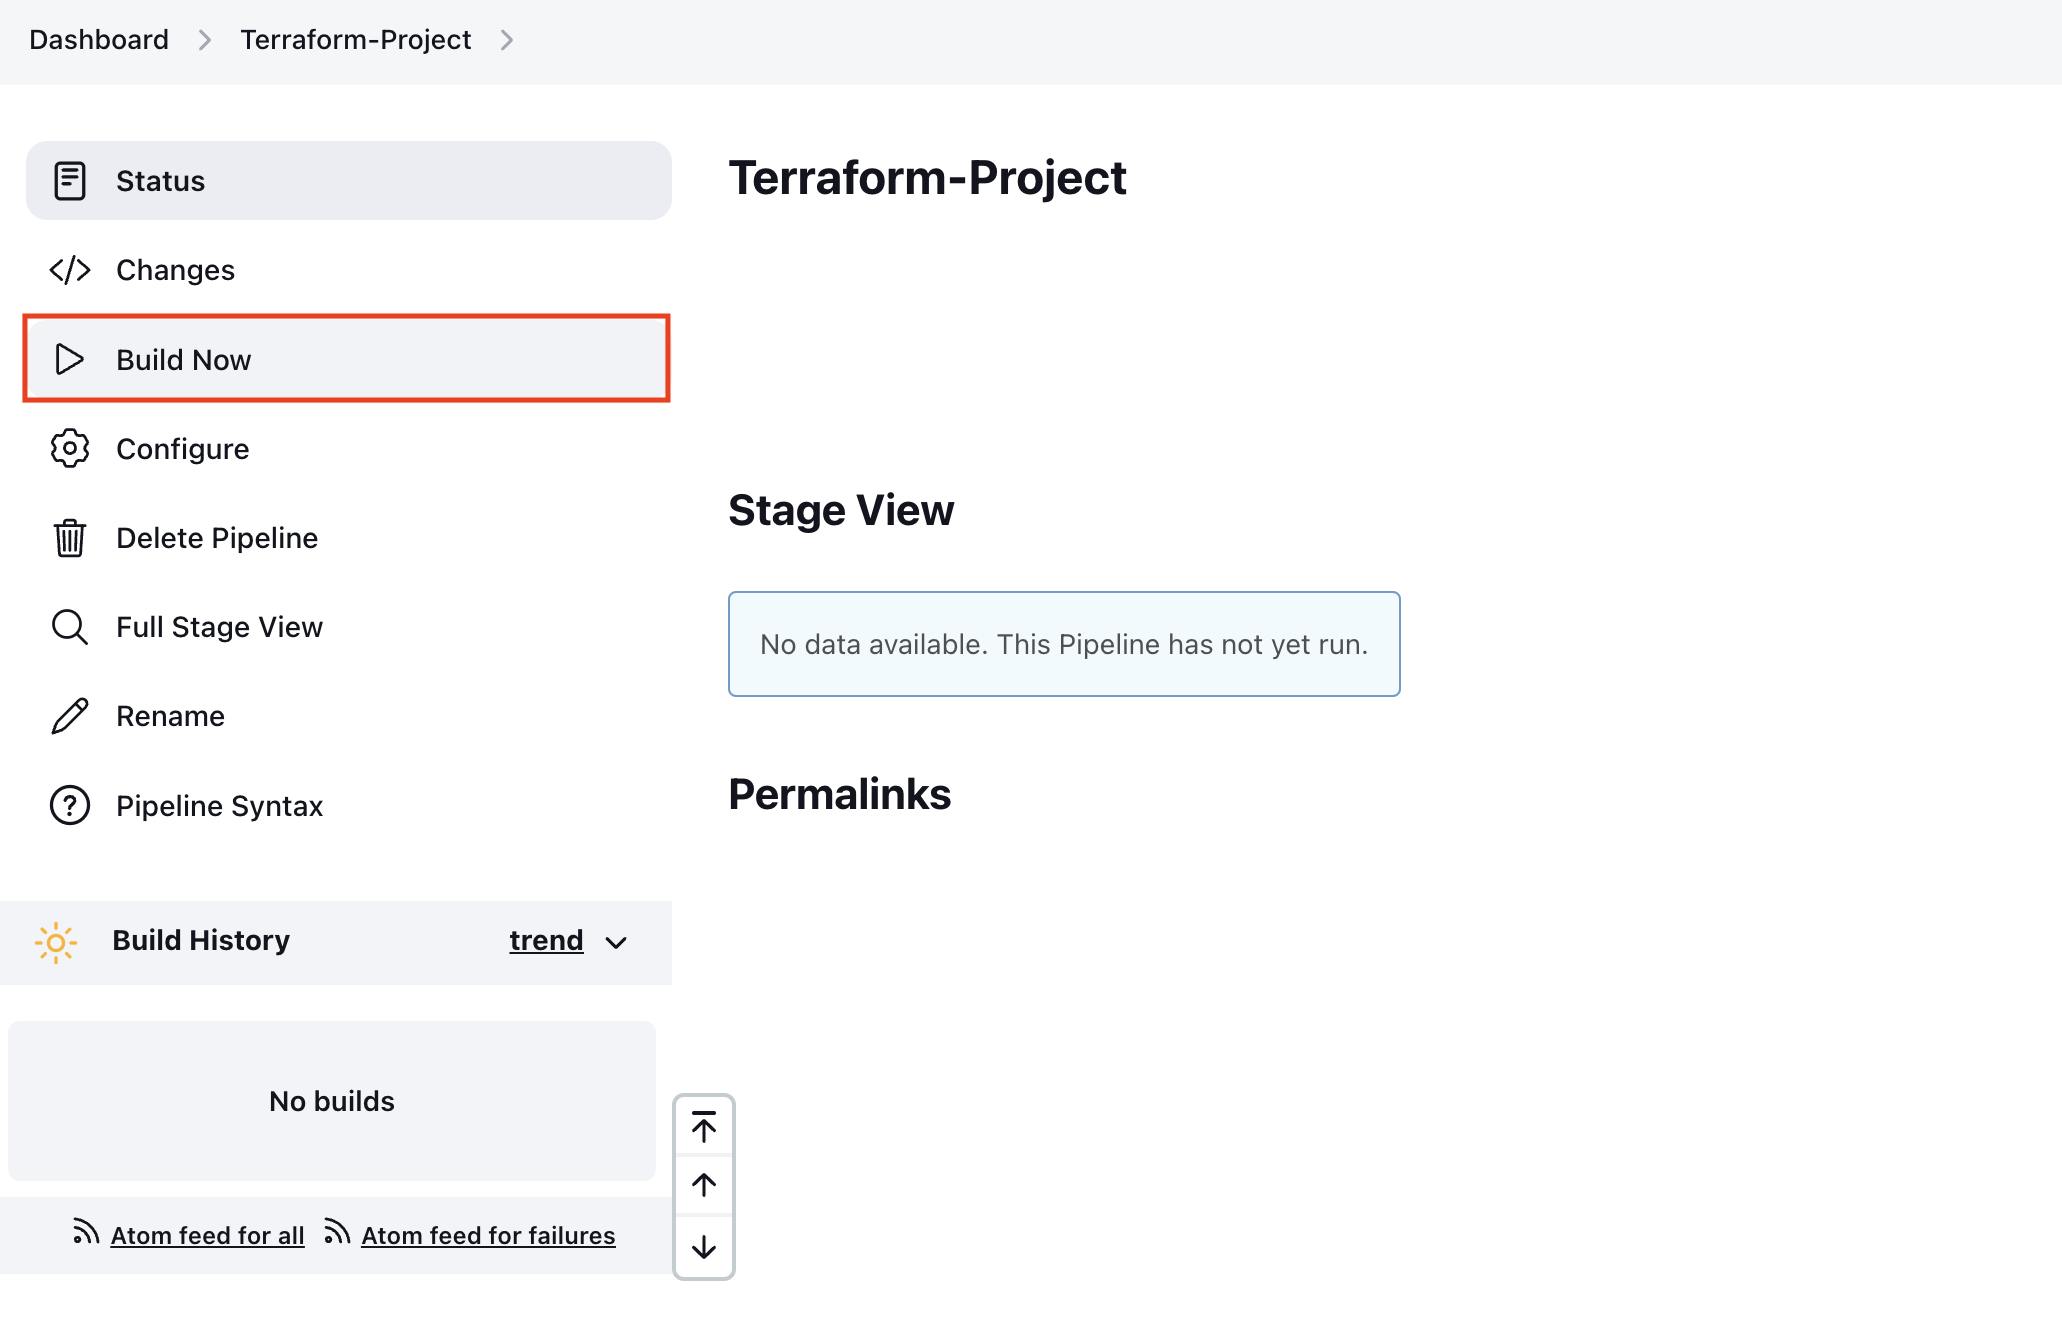
It should work fine, If it's showing some error then check your implementation carefully and try to solve those errors.
I have also gone through a lot of errors to finally implement the whole workflow.
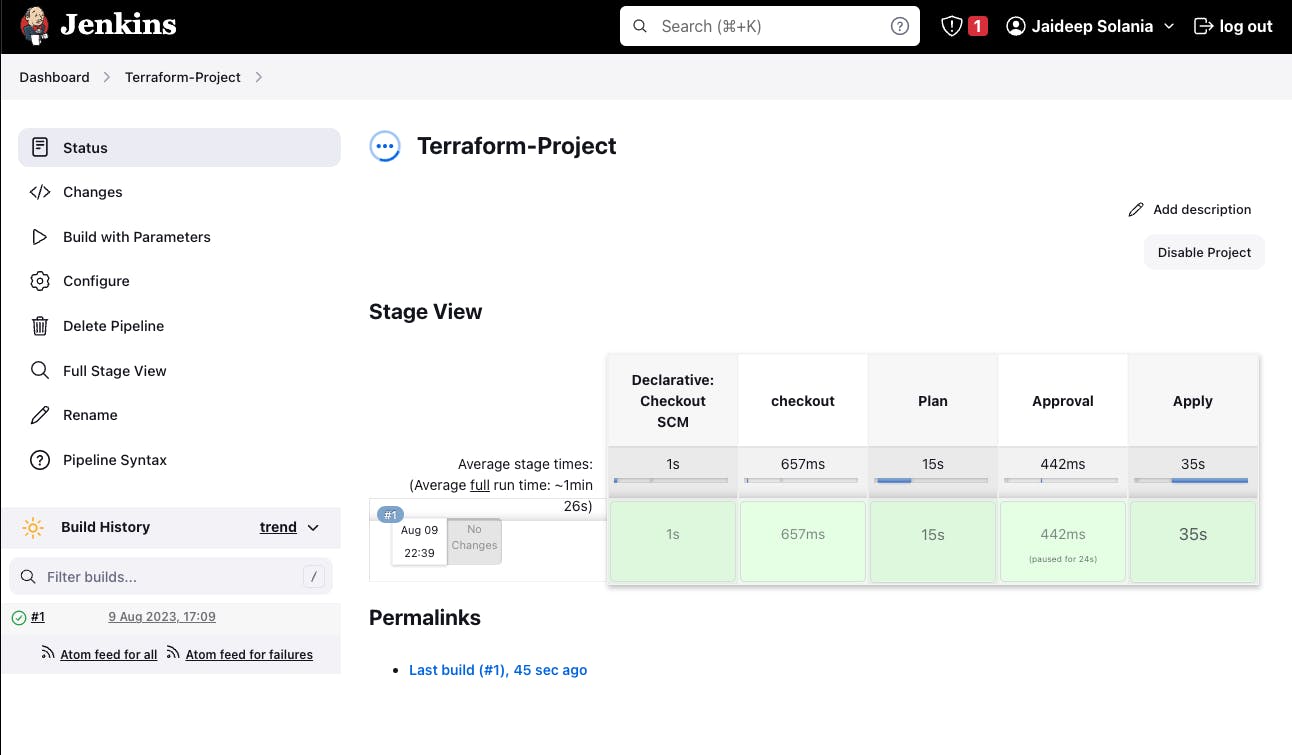
- Now go to AWS > EC2 > Instances and check whether a new instance named Terraform-Instance is created or not.

Congratulations you have successfully created AWS Resources with Terraform and Jenkins 🎉
Thank you for reading ❤️😀
Don't forget to hit a like and share this post if you find it valuable. Connect with me on Twitter, LinkedIn, and GitHub.
Follow me for more such blogs on Hashnode.